Luminosity masking – one of my favorite Photoshop techniques. Luminosity masking lets you make a layer visible according to the brightness value of your photo. For example, you can brighten your photo and then apply luminosity masking so that it doesn’t overexpose the areas that are already bright to begin with. You can also apply color grading effects to different tonal areas. You can do HDR tone mapping with it and a lot more. Luminosity masking is one of the oldest and most useful retouching techniques. I’ve been teaching this since the beginning of my first Photoshop website which was over 12 years ago and I’ve seen others teaching it even earlier – over 15 years ago. But despite it being old, it’s still being used today in pretty much the same way. In this Photoshop tutorial you’ll learn the 2 of the most useful and common methods for luminosity masking. So if you’re ready, let’s get started.
Luminosity Masking Photoshop Tutorial (Layer Mask Method)
There’s two ways to do luminosity masking in Photoshop – one is with a layer mask and the other is with a layer style. There’s pros and cons to both, but I’ll start with the layer mask method.
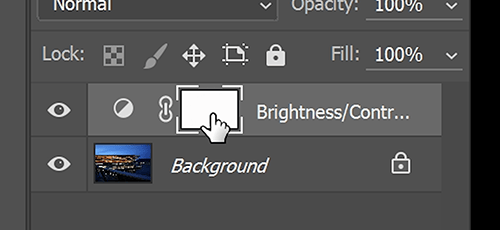
First as an example, I’m going to add a brightness contrast adjustment layer and then bump the brightness up. You can now see that the image is brighter, but the inside of the building is way overexposed.

Step 1
Using luminosity masking, we can make this layer only affect the shadows. Here’s how to do it. First, make sure that your layer mask is selected in your Layers panel.

Then go to Image > Apply Image. This tool lets you place any layer into your current layer or layer mask. It also gives you a lot of options. For example, you can choose the layer, the channel, you can choose to invert the layer or not, set the blending mode and more. It’s quite powerful but for this image, we’re just going to leave the Layer set to Merged, I’m going to enable the Invert option, and the blending mode should be set to either Multiple or Normal. And then when you’re ready, click OK.

Step 2
Our image looks much better. But what exactly happened?
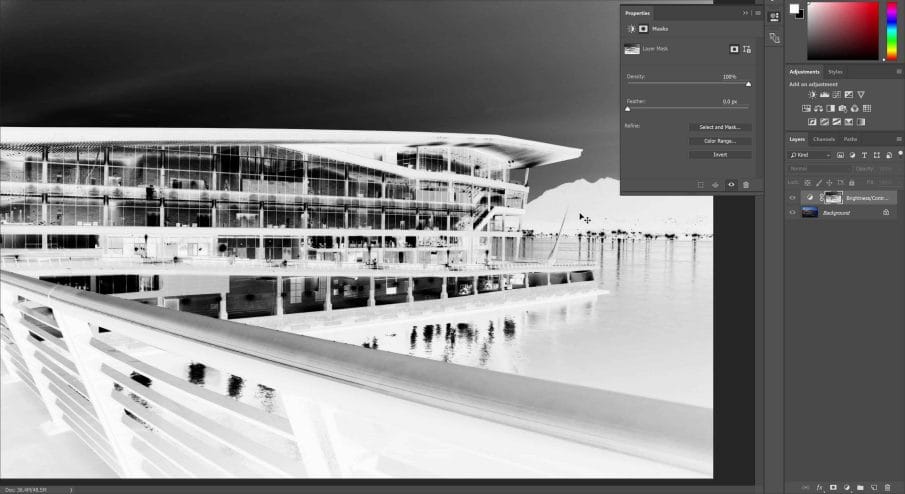
Looking in the layers panel, you can see that we now have an inverted copy of the image in the layer mask. You can hold the Alt/Option key and click on the layer mask thumbnail to preview how it looks. Here we can see that this Brightness/Contrast layer is only being shown in the white areas (which are the dark areas in the photo).

And looking at the area inside the building which was being overexposed, it’s now is being masked out and looks much better.

Step 3
So this is a great way to selectively pick the tonal areas that your layer should appear in. You can also go further and start manipulating the layer mask. For example, if we use the Levels tool by pressing Ctrl/Cmd+L, we can make the layer mask brighter or darker. We can also increase the contrast, lift the blacks, or drop the whites. Luminosity masking with a layer mask is quite flexible.

Step 4
Another thing you can do is to blur the layer mask. If we look at this area here, the contrast is a bit low.

But we can blur it to increase the clarity. To do this, go to Filter > Blur > Gaussian Blur. If you use a small setting like 3 pixels, it’ll sharpen the edges for better results.

If you use a larger number like 20 pixels, it’ll increase the clarity like this. But if you do this, becareful of halos that can appear between light and dark areas. For example, look at the roof of this building, there’s a slight glow around it. For this image, it’s not really that noticeable but it is something you need to be careful of whenever you’re doing this.

Final Results (Layer Mask Method)
So that was one way to use luminosity masking. Here’s how it looks like before and after.
You can also use it with other layers such as the Vibrance, Saturation, Color Lookup, Color Balance, etc. Actually you don’t need to use luminosity masking with the Color Balance adjustment layer. Same thing with the Curves adjustment layer. I’m pretty sure there’s other ones too. But I’ll tell you why later.
Luminosity Masking Photoshop Tutorial (Layer Style Method)
Let’s learn the 2nd method of luminosity masking. Most people use the first method that you just saw because it’s the most widely taught. But there’s a more efficient way to do luminosity masking. Instead of using the layer mask, you can use a layer style instead. This is the method that you should be using whenever you can. It’s not as flexible, but it’s more efficient and futureproof (more on that later).
Anyways let me show you how it’s done. I’m going to delete this layer mask because we don’t need it anymore.

Step 1
To apply luminosity masking to this layer, just right-click on the layer and then go to Blending Options. Here in the Blend If settings, you can change the tonal areas where this layer is visible. So if I drag the white input slider towards the left, this layer will only be visible in these tonal ranges. And as I adjust, you can see the bright areas being restore.

Step 2
But if we look at the results, the transition is really sharp and you get a lot of ugly artifacts. There’s a trick to smooth this out and it took me years before I found out about this. If you hold the Alt/Option key, the slider will split in half and you can fade the tones.


If you want really smooth results, you can even drag the sliders all the way to both ends like this.

By the way, there’s two bars here which you can adjust. Basically it’s like this. The top one will tell Photoshop to show this layer if this layer is within these tonal ranges.

The bottom one will tell Photoshop to show this layer if the underlying layers are within these tonal ranges. You can just try out both to see which one works better but a lot of times, it doesn’t really matter which one you use – you’ll still be able to get good results from both.

Final Results
We’re done with the luminosity mask. Here’s how it looks like before and after
Layer Style Luminosity Masking Pros and Cons
Even though the layer style is more efficient, you can’t manipulate the mask like you can with an actual layer mask. You can’t do things like apply a Gaussian blur or use the levels tool on the layer mask. But it is more efficient and lighter weight. Your Photoshop document will be smaller and it’s more adaptive.
When You Don’t Need Luminosity Masking
There are also times when you don’t even need to use luminosity masking. For example, the color balance adjustment already lets you select different tonal ranges. So if let’s say you want to tint the shadows blue, just select the shadows from the dropdown menu and do it from there. It’s much more efficient than creating your own luminosity mask.

Same with the curves adjustment. It already lets you make adjustments based on tonal areas so you don’t need to use it there.
Luminosity masking is also built into some filters like the Smart Sharpen filter. Again, if the built-in luminosity masking is good enough, there’s no need to do it yourself.

That’s how you do luminosity masking in Photoshop. There are some Photoshop plugins for luminosity masking, but I find that this is something that’s already easy and fast to do. In fact, I find that in most situations, it’s actually faster to do it yourself than it is to use a plugin.
The only time I would recommend those plugins is if you’re doing something complicated with many layers such as HDR tone mapping.
By the way, if you’re interested in that, I have a set of HDR tone mapping Photoshop actions that will let you tone map multiple exposures in just a couple clicks. And just like most of my products, there’s a free version if you can’t afford to buy it.
