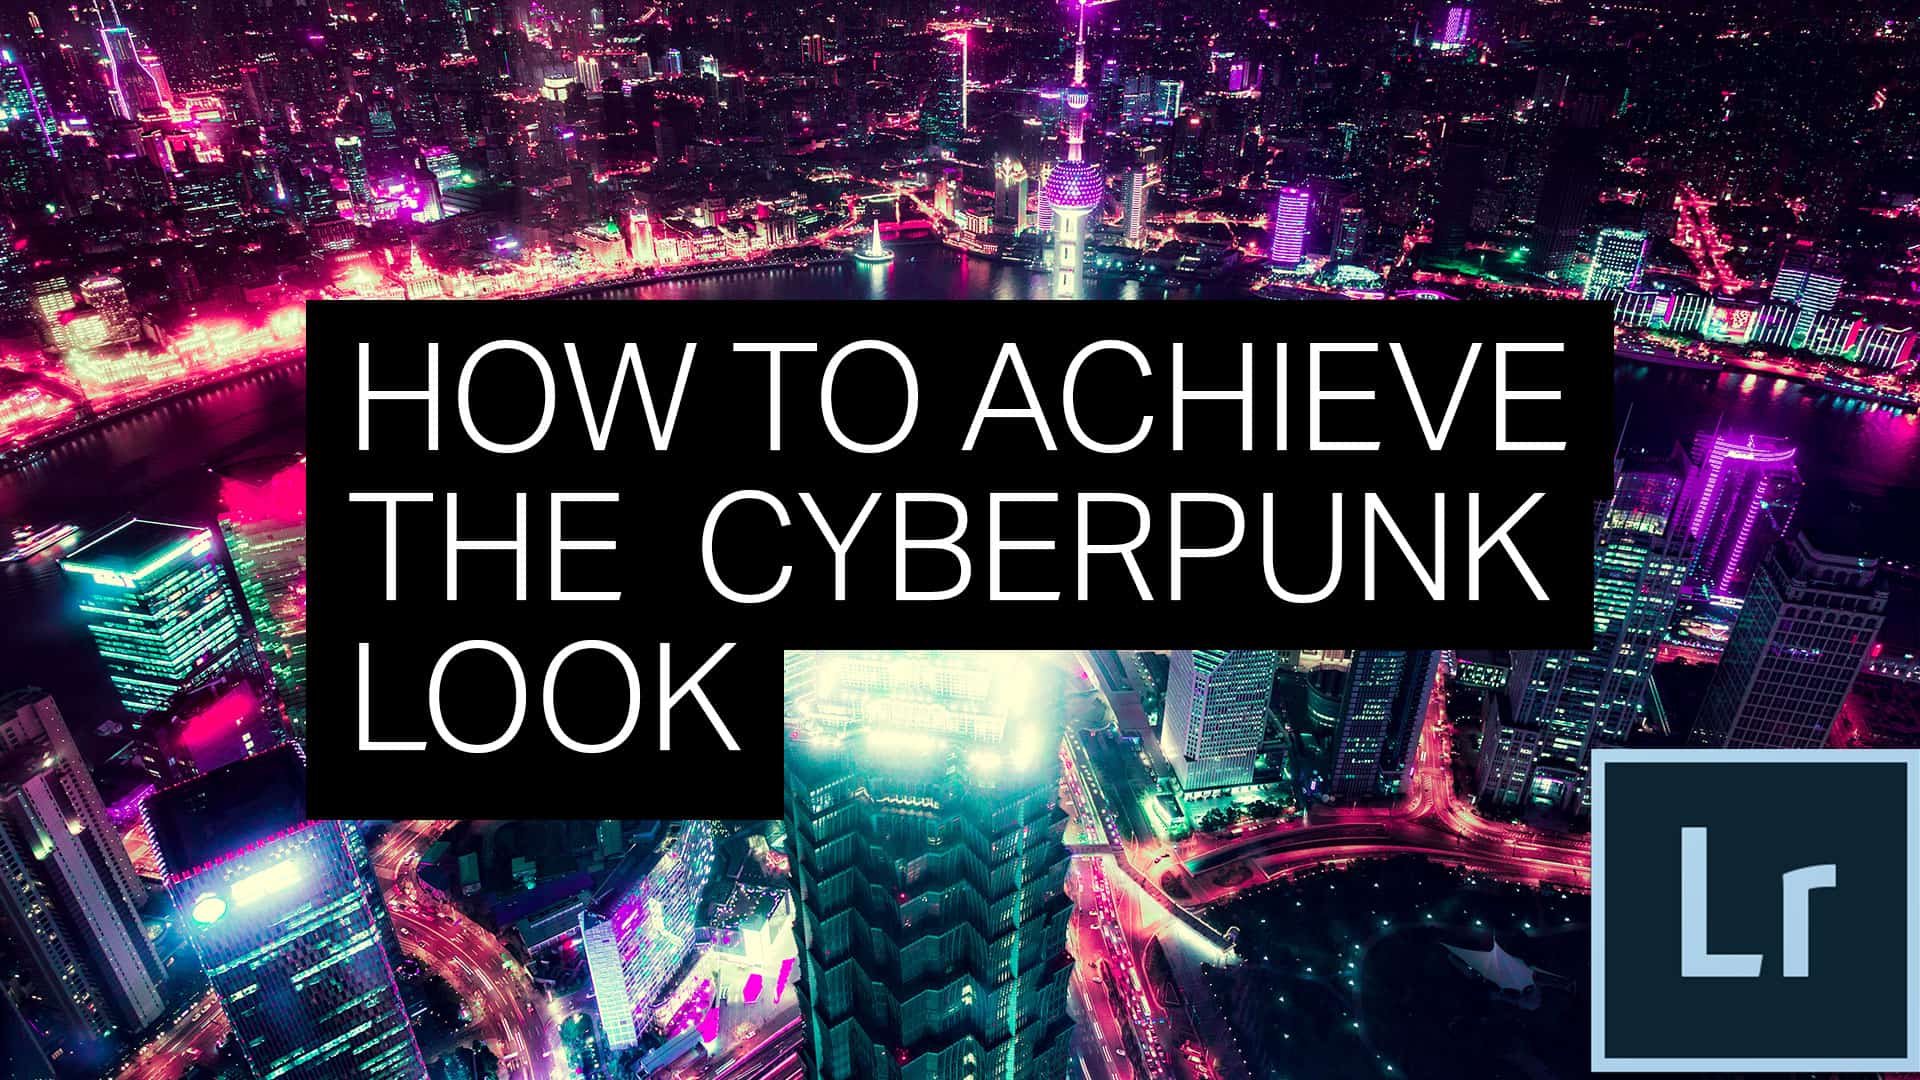
Hello and welcome to this episode of Denny’s Tips. In this tutorial, you’ll learn how to achieve the cyan and pink cyberpunk look in Adobe Lightroom CC. This retrofuturistic look works amazing for nighttime cityscapes. You’ll first learn how to shift the hue drastically – far beyond what Lightroom allows you to do with the basic HSL settings. Then you’ll learn how to add contrast with the Tone Curve. And finally, you’ll learn an incredibly cool trick that combines two settings to create a diffused glow effect. By the way, you’re not limited to pink and cyan. This technique can be used to create a lot of other combinations. If you’re interested, keep watching and find out how to do it.
Cyberpunk Lightroom Presets
Before we begin, I just want to let you know that I have some Cyberpunk Lightroom presets that you can download for free. There are three presets and they’re made with the same technique that you’ll learn in this video.
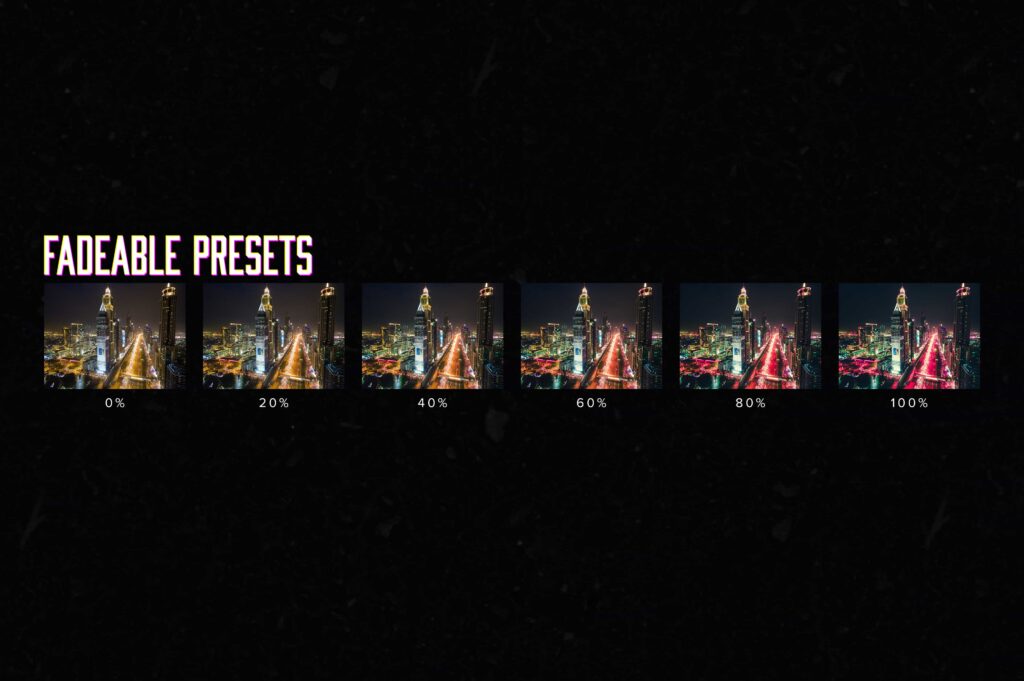
If you upgrade to the Pro version (and thank you so much for your support by the way), you’ll unlock all 10 presets. The presets in the Pro version are fadeable so you can pick something lighter or stronger depending on what you want. You also get LUTs that you can use in other software like Photoshop, Affinity Photo, Adobe Premiere and more. You can find links in the video description below but whether you’re using the presets or not, I highly recommend watching this video to the end because you’re going to learn a lot in a short amount of time.

Shifting the Hue
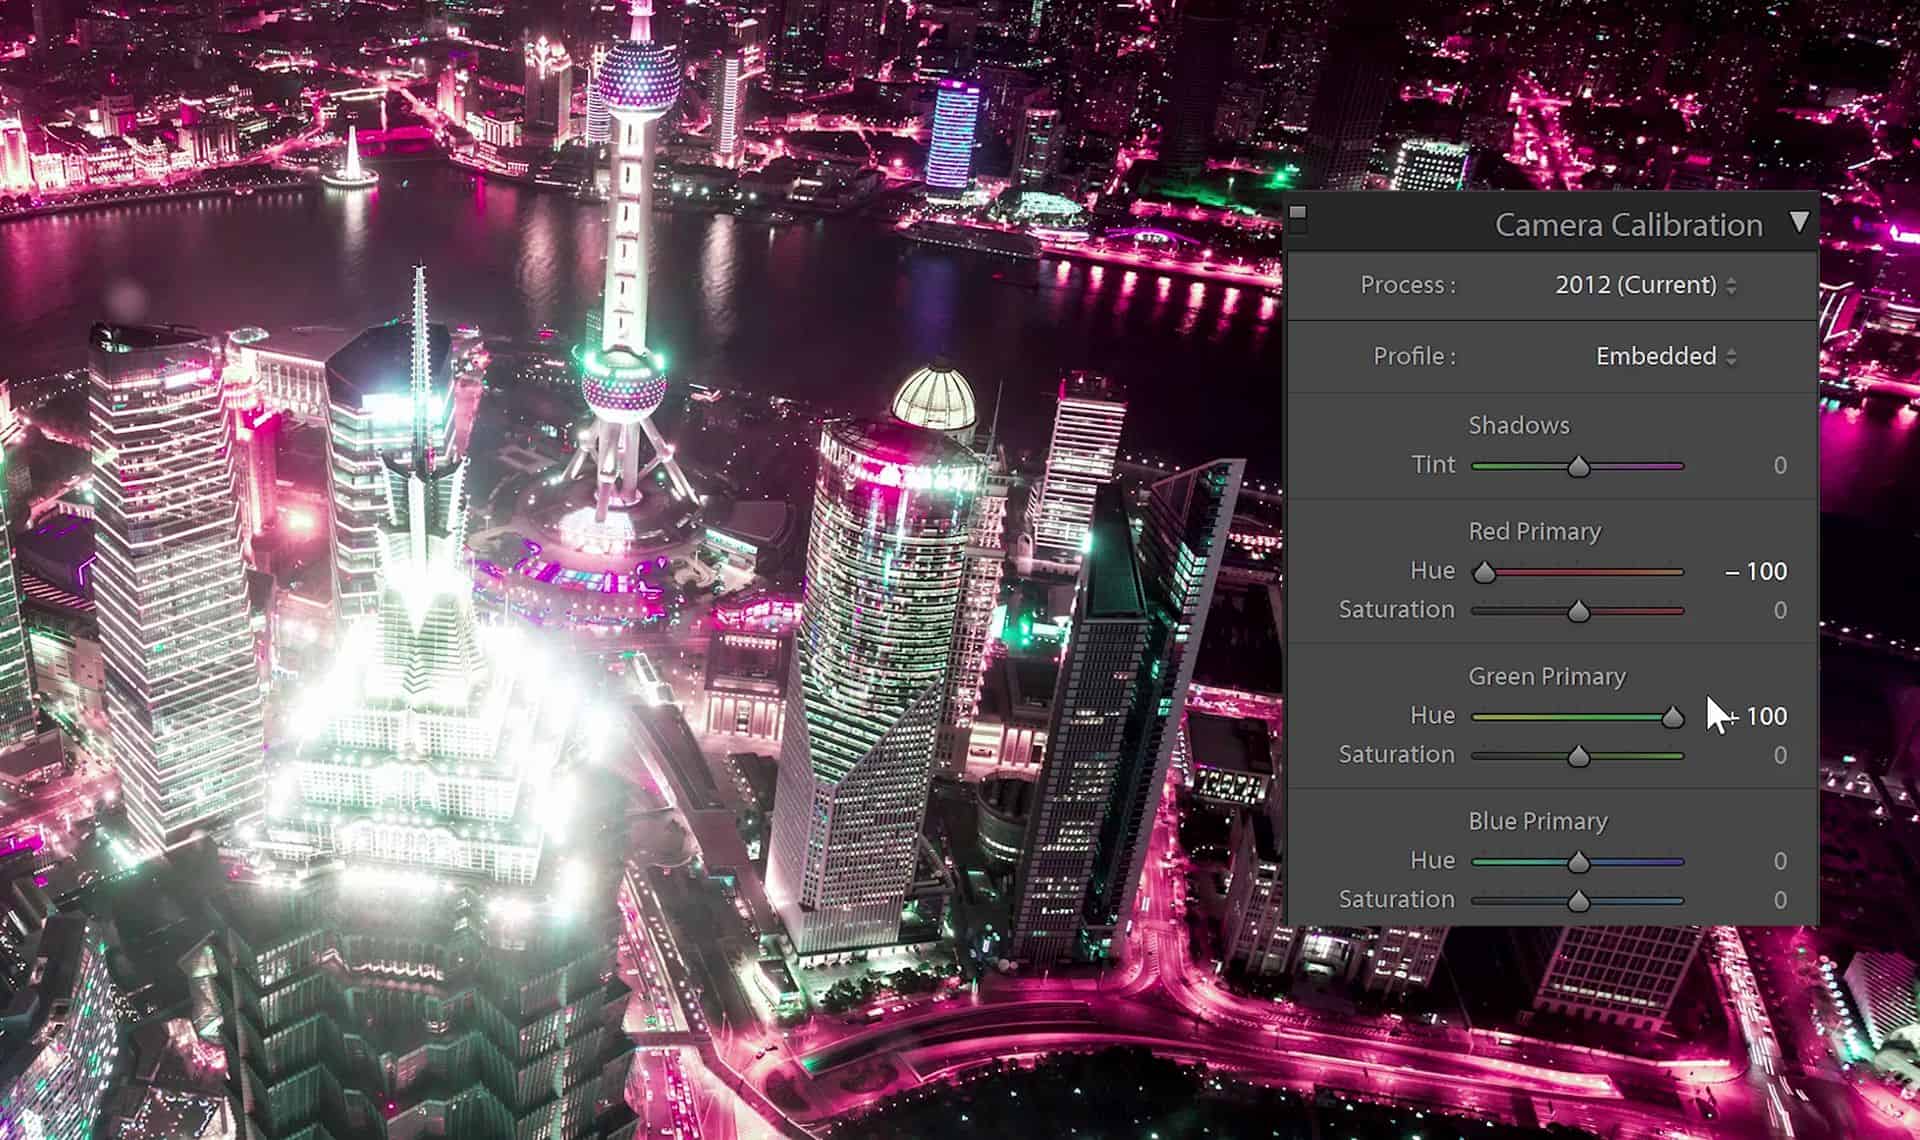
First we’re going to shift the hue. Typically you would do this in the HSL section but it won’t let you shift the colors far enough. So in these situation, you can push it beyond those limitations in the Camera Calibration section.
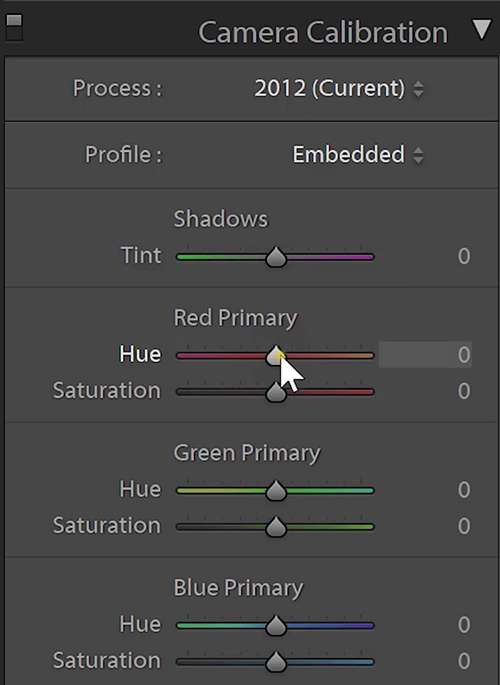
I’ll start by shifting the Red channel all the way towards the left which will push the colors towards pink. Next, shift the Green channel towards the right to get the purple and cyan colors. You can also play around with the other settings such as the saturation adjustments.
Balancing the Colors
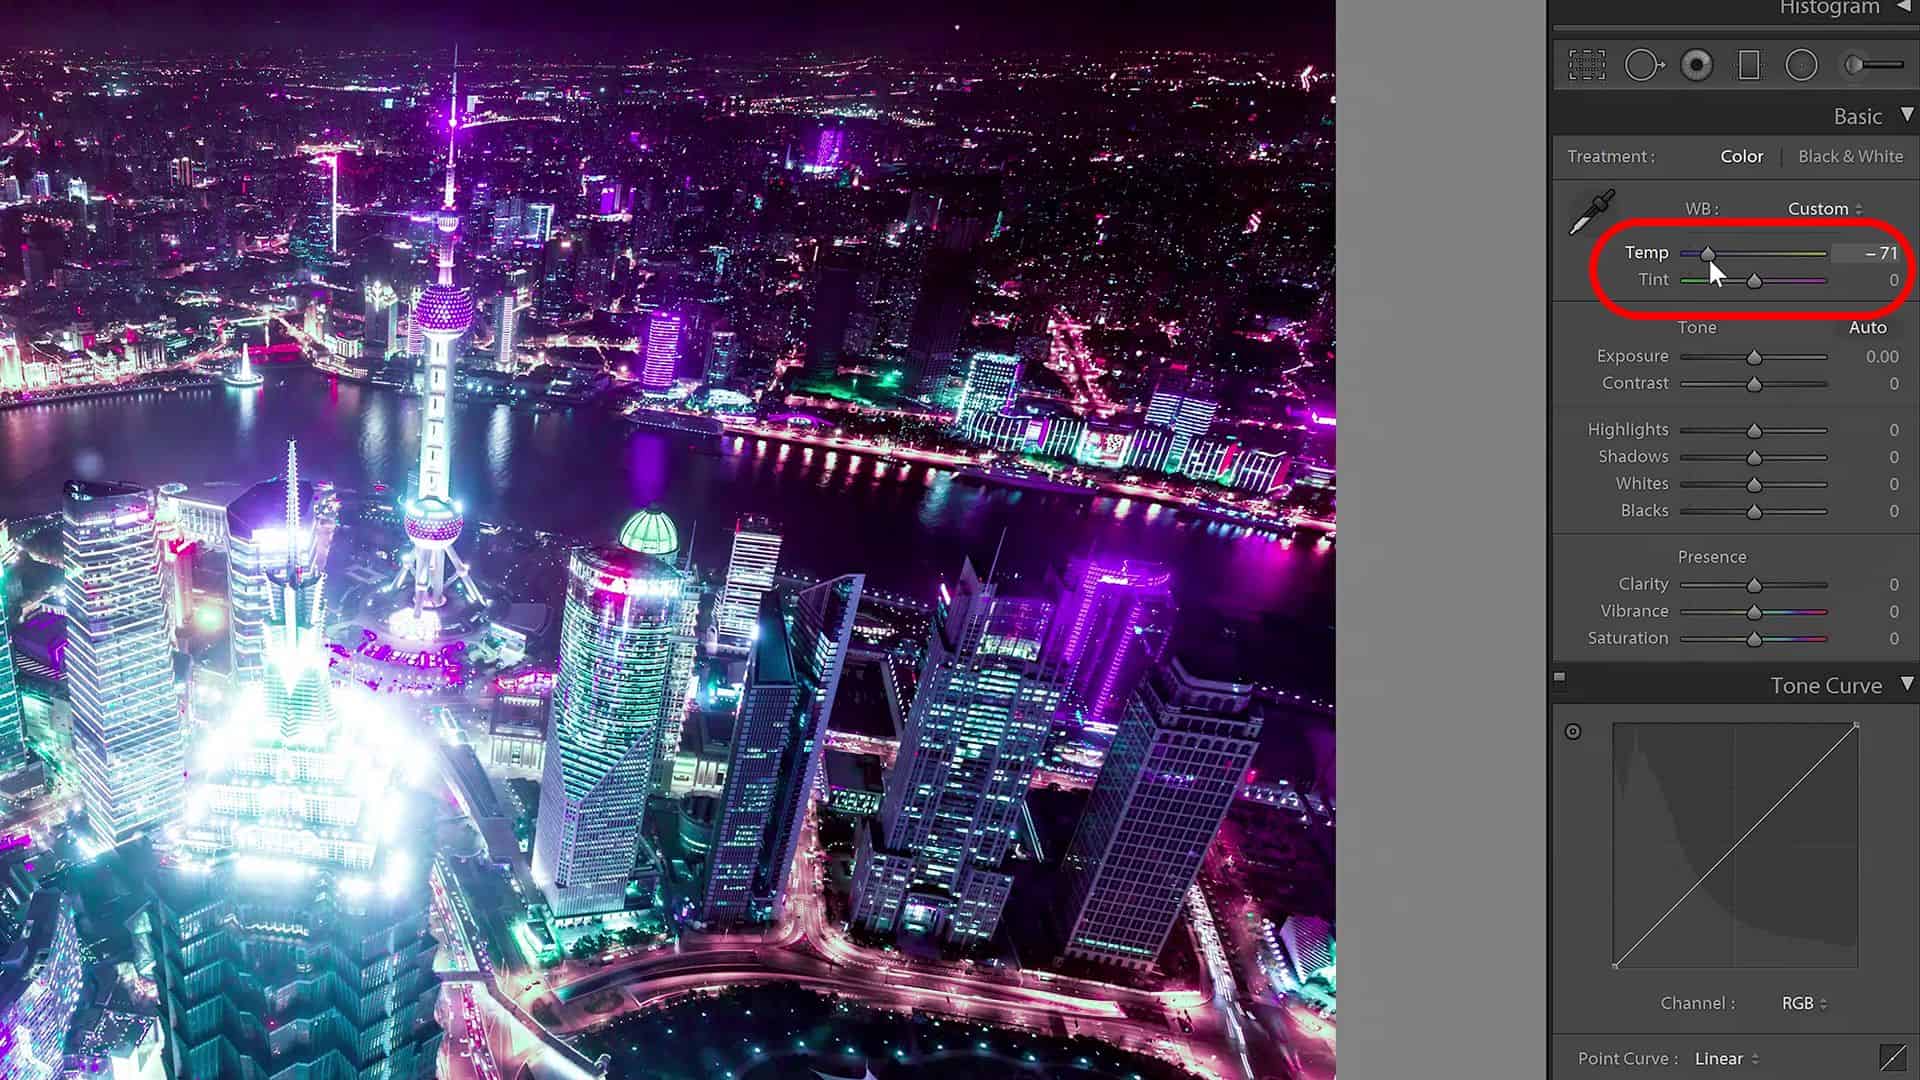
If you want to change the balance between cyan and pink colors, you can easily do it with the white balance adjustment. Simply drag the slider towards the left or right to get the balance that you want.
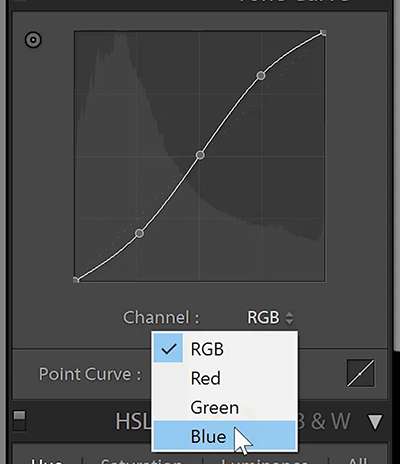
Adding Contrast
Next, we’re going to add some contrast in the Tone Curve section. This tool has two modes and you can switch by clicking on this icon here. You want to be in the point curve mode which will give you more flexibility and let you create more advanced adjustments.
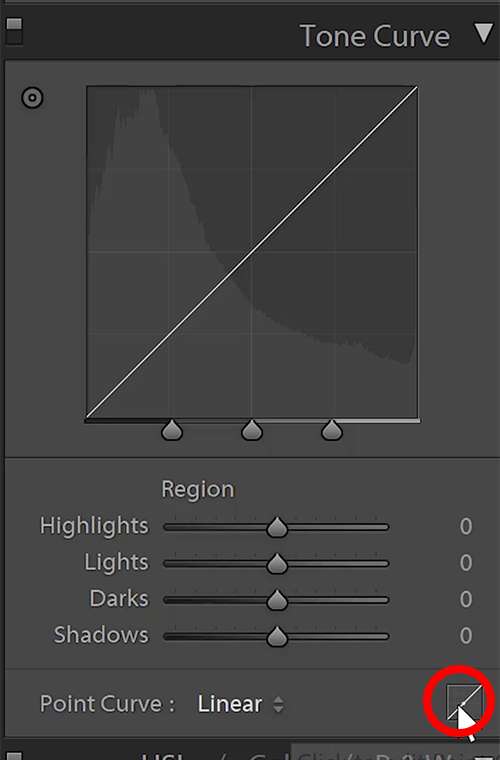
For beginners, imagine that the tone curve looks like this with a gradient in the background. Start by adding 3 more points to the line like this. It should align with the grid in the background.
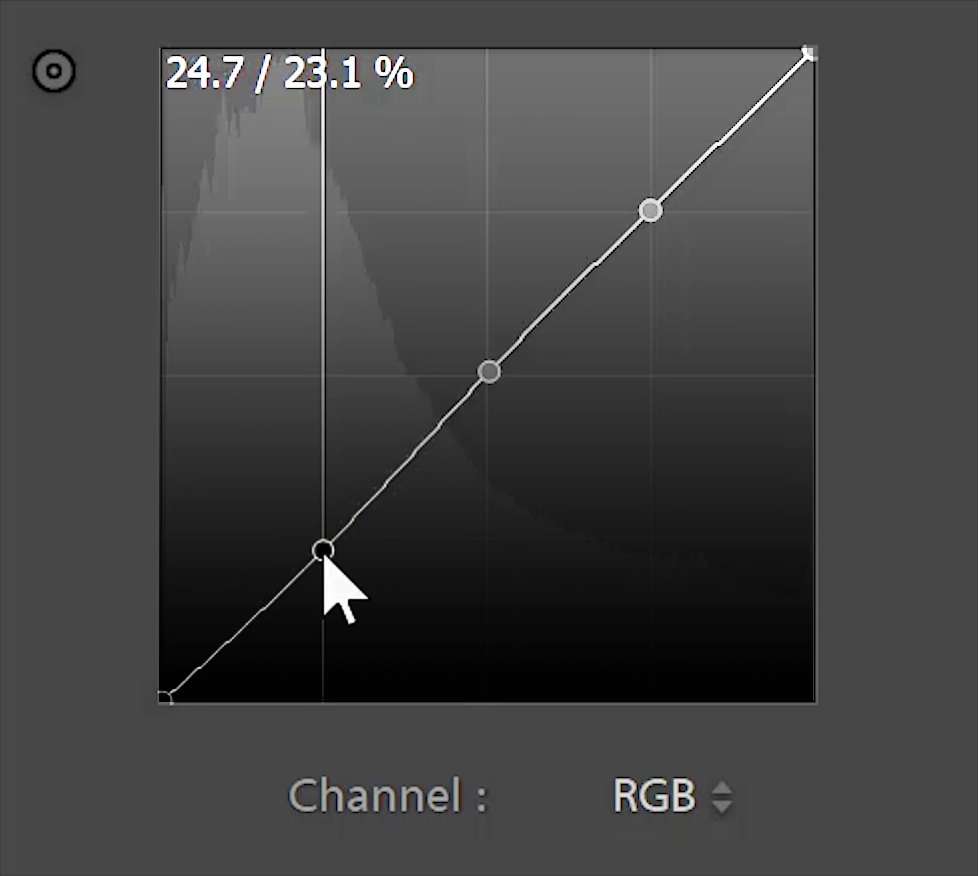
Drag the 2nd point downwards to darken the shadows. Then drag the 4th point upwards to brighten the highlights.
You can also drag the bottom-left point upwards to lift the blacks which will create an effect like this. But for my image, I’m going to leave it back at the bottom.
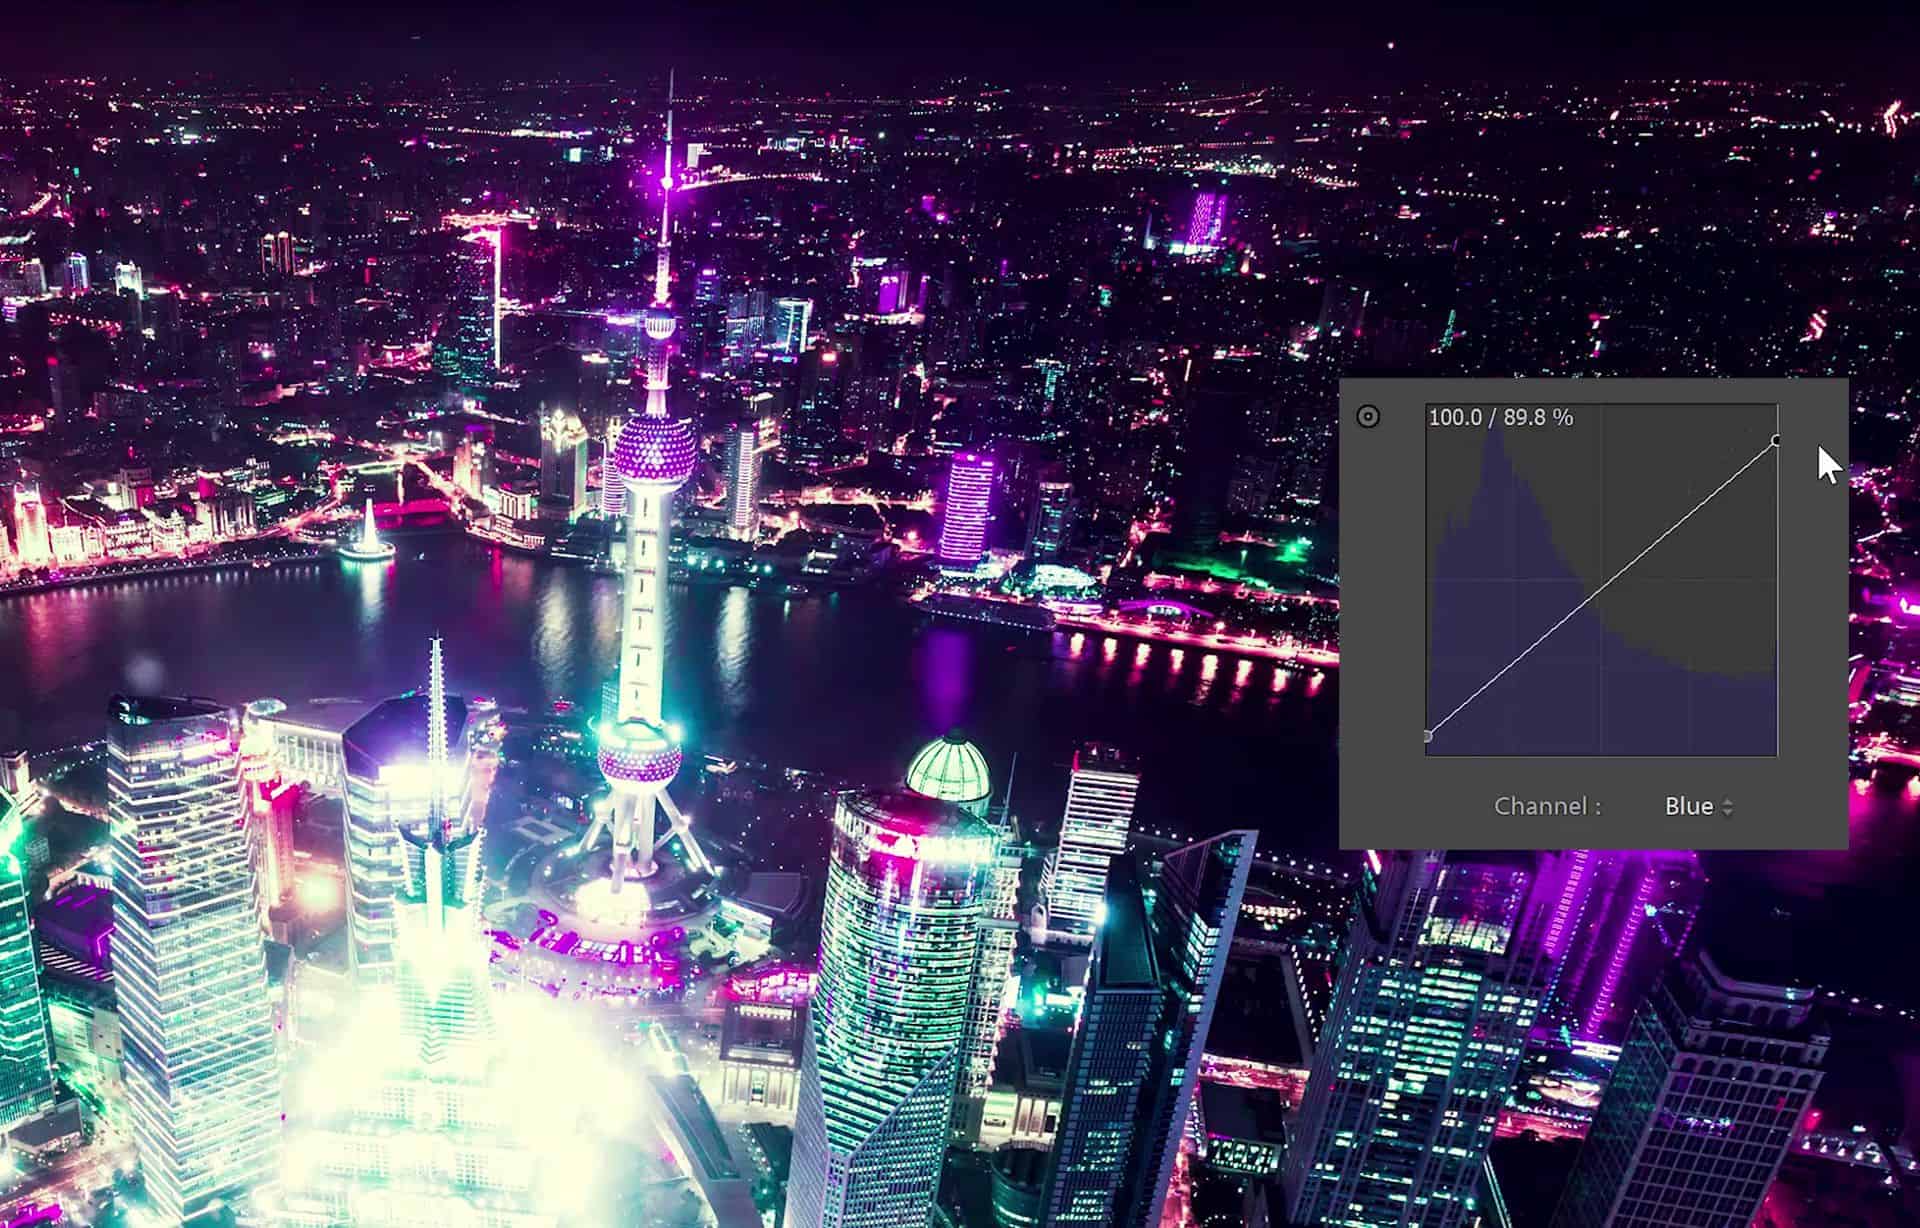
Tinting the Shadows and Highlights
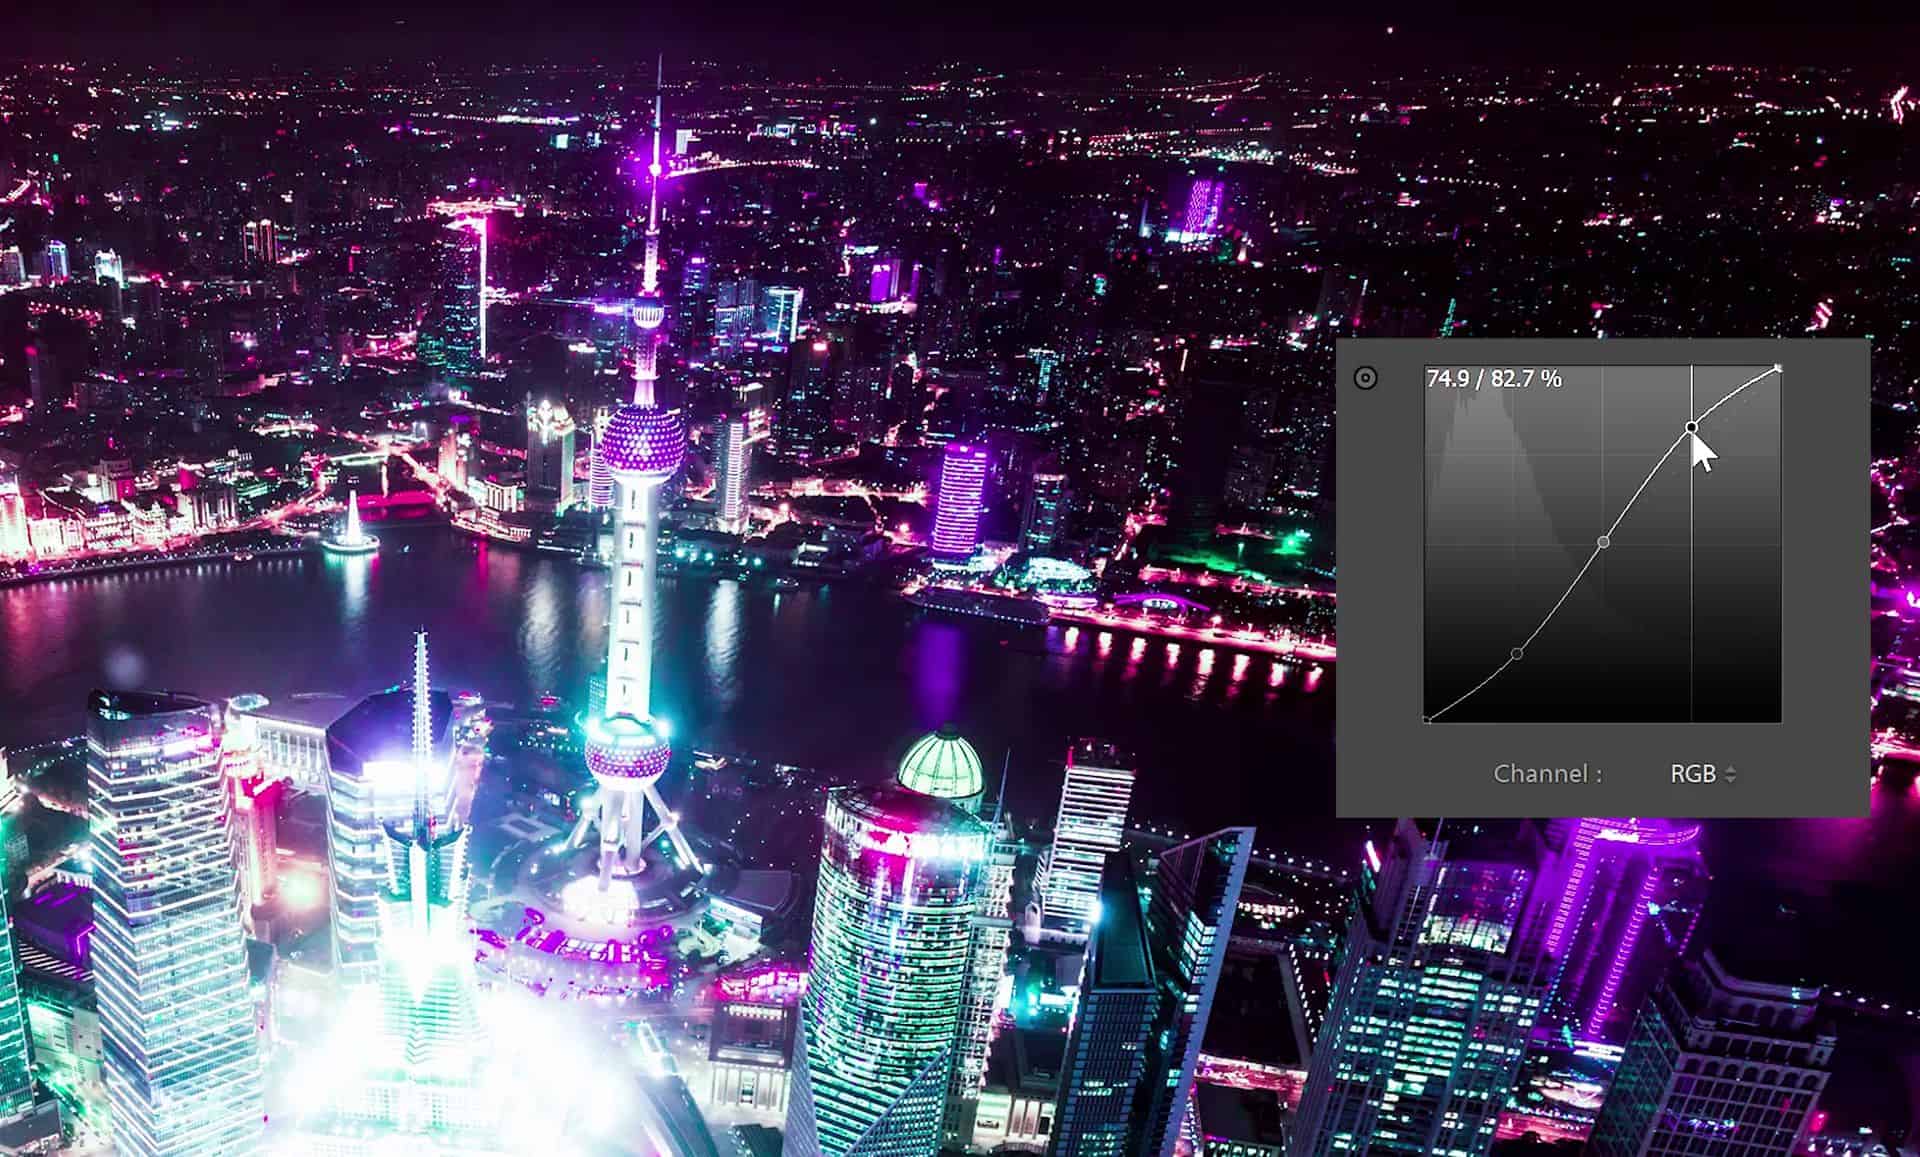
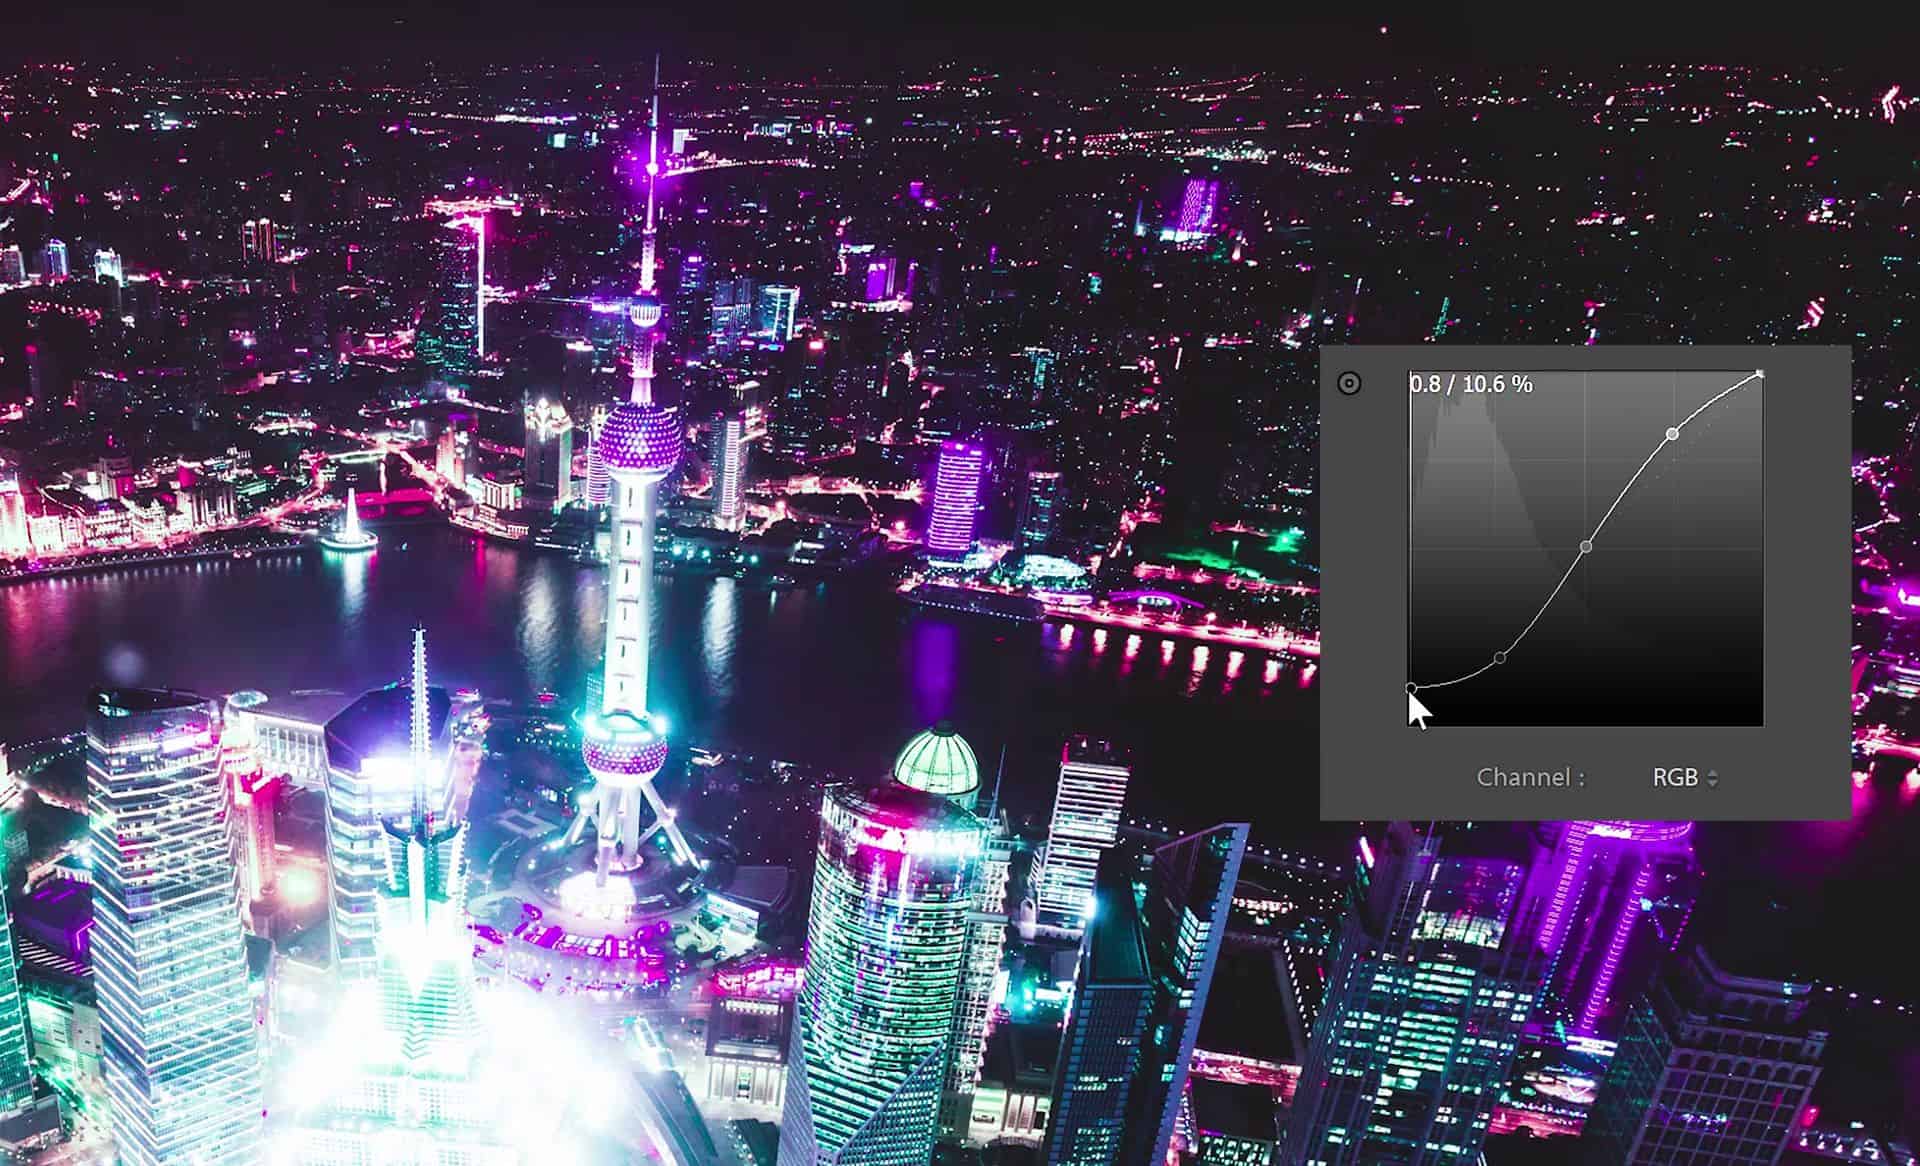
Now we’re going to tint the shadows and highlights using the same Tone Curve adjustment. In the dropdown menu, select the Blue channel.
Drag the bottom-left point upwards which will tint the shadows blue. Next, drag the top-right point downwards to tint the highlights yellow.
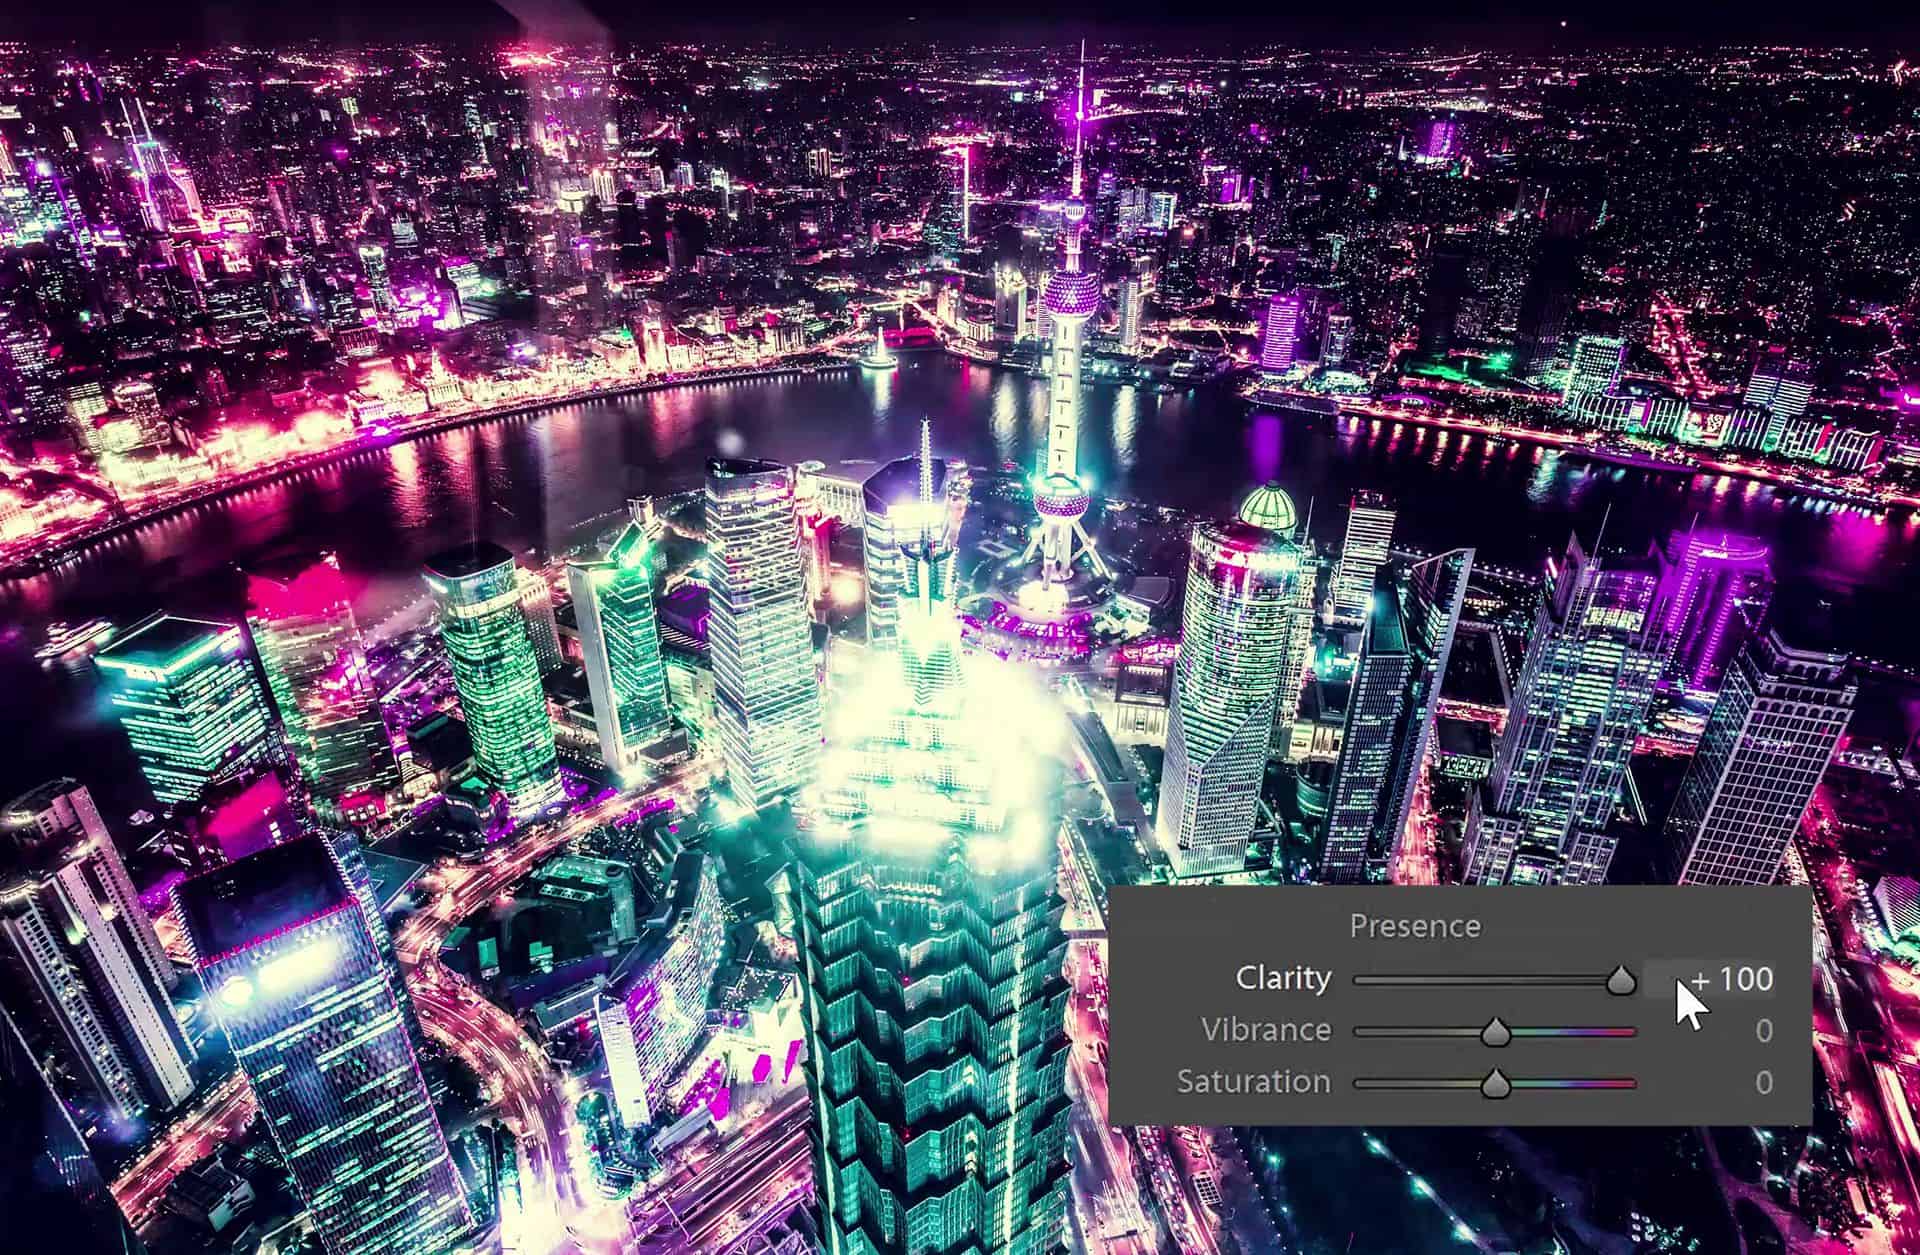
Clarity
Finally we’re going to adjust the Clarity setting. There’s two ways you can go about this. First, you can increase the clarity to give your photo the really sharp and high-detailed look.
Or you can create a diffused glow effect by lowering the Clarity. But when you lower the Clarity, it makes your entire image look soft.
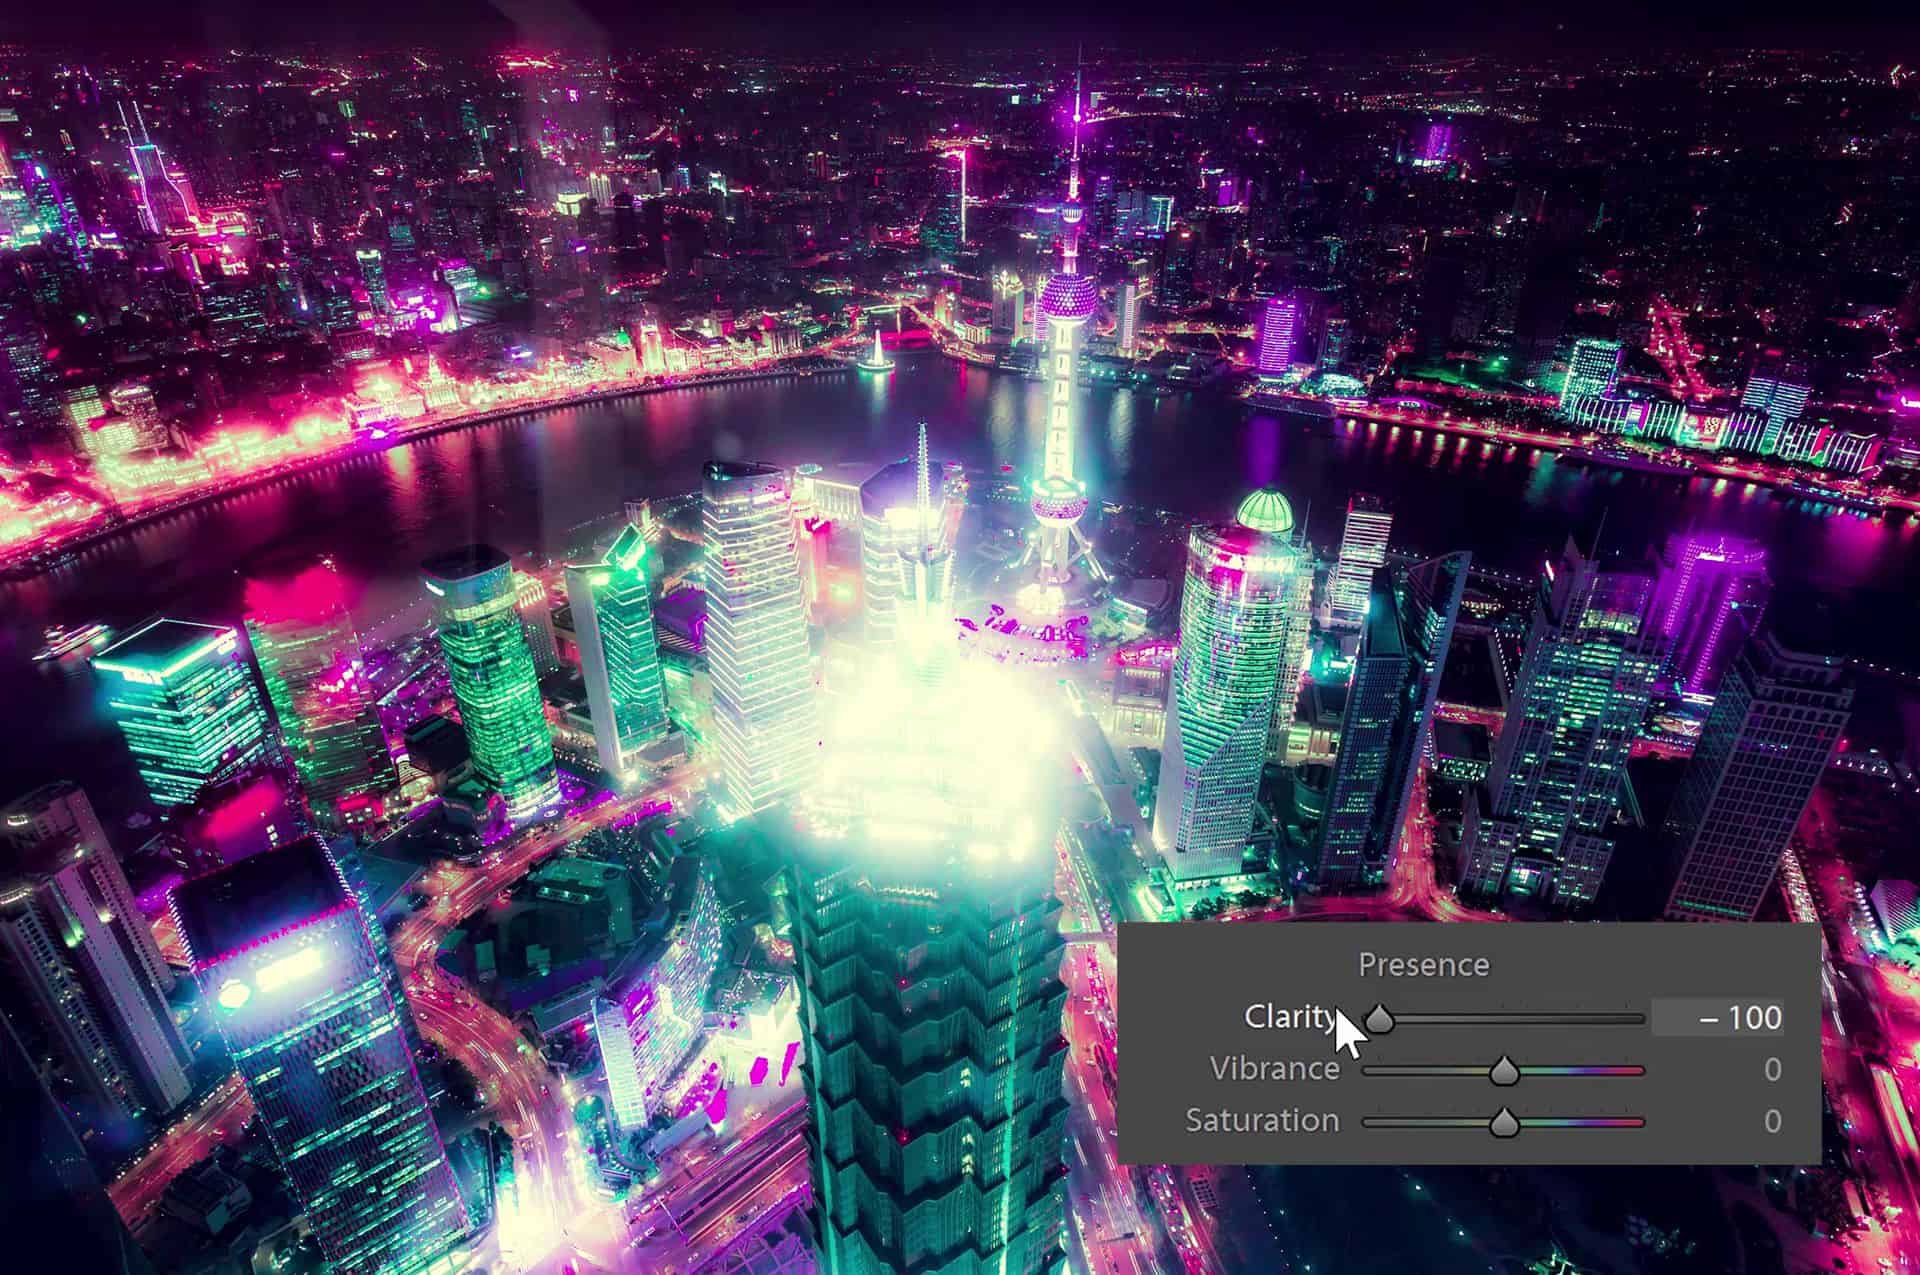
So to counteract this, you can go to the Effects section and increase the Dehaze setting. This will bring back some of the contrast in the shadows and focus most of the diffused glow effect in the bright areas.

We’re done. Here’s how the image looks like before and after.


More Examples
This technique can also be used to create many other looks. Here are some more examples of what you can create with this technique.


Hello and welcome to this episode of Denny’s Tips. In this tutorial, you’ll learn how to achieve the cyan and pink cyberpunk look in Adobe Lightroom CC. This retrofuturistic look works amazing for nighttime cityscapes. You’ll first learn how to shift the hue drastically - far beyond what Lightroom allows you to do with the basic HSL settings. Then you’ll learn how to add contrast with the Tone Curve. And finally, you’ll learn an incredibly cool trick that combines two settings to create a diffused glow effect. By the way, you’re not limited to pink and cyan. This technique can be used to create a lot of other combinations. If you’re interested, keep watching and find out how to do it.