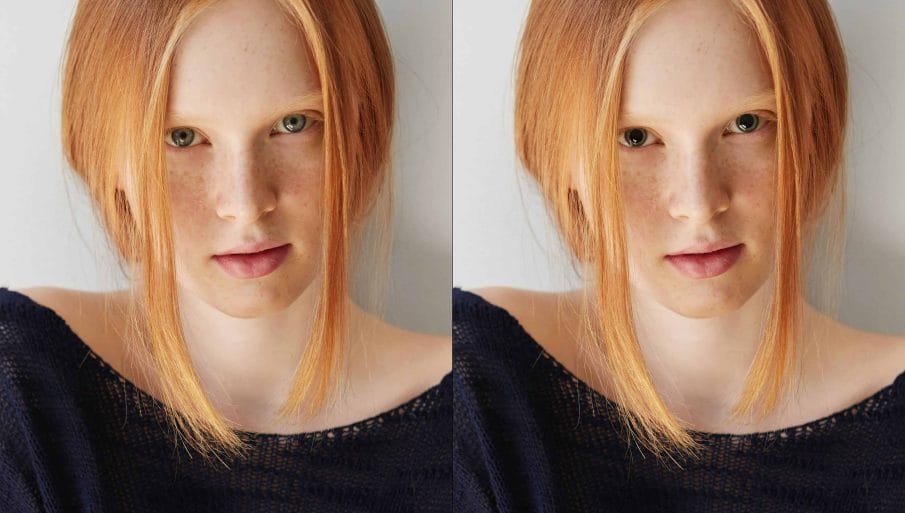
Today I want to teach you a retouching technique that not a lot of people pay attention to. I’ll be teaching you how to enhance the eyes by enlarging the pupils in Photoshop. The pupil size can apparently make your subject more appealing. In some places like Korea and Japan, it’s quite common to find people buying fake contacts that make their pupils look bigger. There was also a study a long time ago where they showed two sets of photo. They both are the same except that one had the pupils dilated. People prefer the photo with the dilated pupils… and when they’re asked why, they can’t explain it. There are a lot of ways to retouch portraits. Enlarging the pupils is just one of them. But sometimes the smallest part of your photo will have the biggest impact. So if you’re interested, read this Photoshop tutorial and I’ll show you how to dilate the pupils.
Dilate Pupils Photoshop Tutorial
Step 1
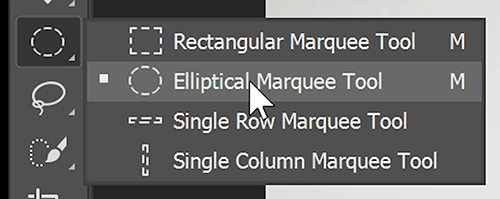
For this tutorial, you should be working on a high-res photo where you can see the details in the eye. So we’re first going to start by making a selection of the pupil and then we’re going to enlarge it. In the toolbar, select the elliptical marquee tool.
Zoom in really close into one of the eye. You want to be able to see all of the details while editing.

To make a selection of the pupil, drag from the center of the pupil and if you hold the Alt or Option key, it’ll drag it out from the center. Then hold on to the Shift key which will give you a perfectly round circle.

Step 2
We have our selection and to preview how it will look, let’s fill it with white. You can do this quickly by pressing D on your keyboard to reset the foreground and background color…. Then pressing Ctrl/Cmd+Backspace to fill it with white.

The edges look quite hard. So let’s undo the fill by pressing Ctr/Cmd+Z then press Shift+F6 to bring up the feather selection tool. This lets you soften the edges of your selection. Enter something small… sometimes even half a pixel is good enough.

Fill the selection again to preview it and if it looks good, duplicate the layer by press Ctrl/Cmd+J.

Step 3
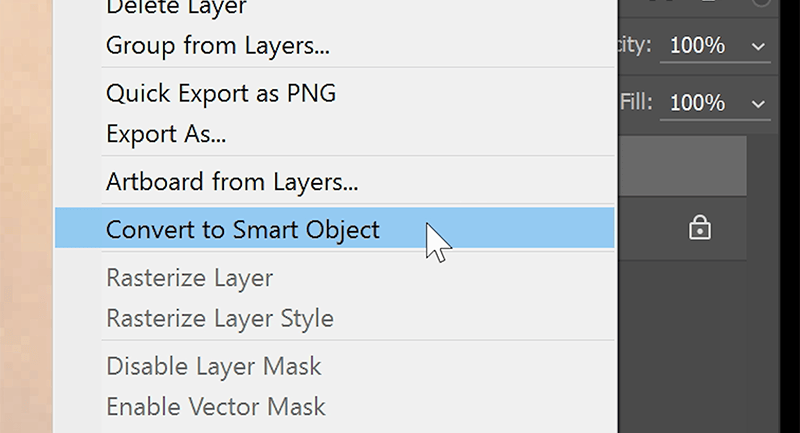
Before we start transforming, it’s a good idea to convert the layer into a Smart Object. So right-click on the layer and then choose “Convert to Smart Object”.
Step 4
Press Ctrl/Cmd+T to use the Transform tool. While holding Alt+Shift or (Option+Shift on Macs), enlarge the pupil like shown in the image below. When you’re done, press Enter to apply the transformation.

Zoom out and see how it looks. Obviously mine looks way too big and unnatural so I’m going to transform it back down. UUsually when you’re transforming up and down like this, it’s going to reduce the sharpness. But because this is a Smart Object, you can actually resize it as many times as you like and you won’t lose any image quality. And that’s just one why you should always use Smart Objects whenever you can.


Step 5
Speaking of Smart Objects, here’s another reason why you want to use it. If we look closely at the pupil, it’s blurry and the noise details became splotchy. We can fix this by adding some noise which will artificially sharpen it.
To do this, go to Filter > Noise > Add Noise. Zoom in so that you can see the details then adjust the noise like this. You want a noise pattern that’s subtle and looks like something natural out of your camera. Now if your image is black and white, you want to checkmark the monochromatic option. Otherwise, just click OK to apply the changes.

Step 6
Looking in the Layers panel, you can see that because we applied this filter to a Smart Object, your filter became a Smart Filter which is fully editable. You can doubleclick back on the filter to change the settings any time you want.
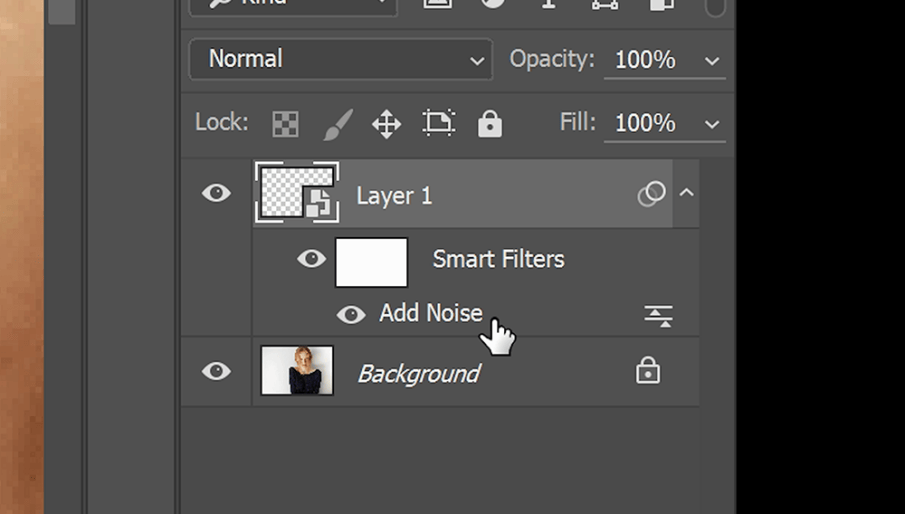
Another feature of Smart Filters is that you can doubleclick here to bring up the blending options and lower the opacity. I’m going to set mine to around 50%.
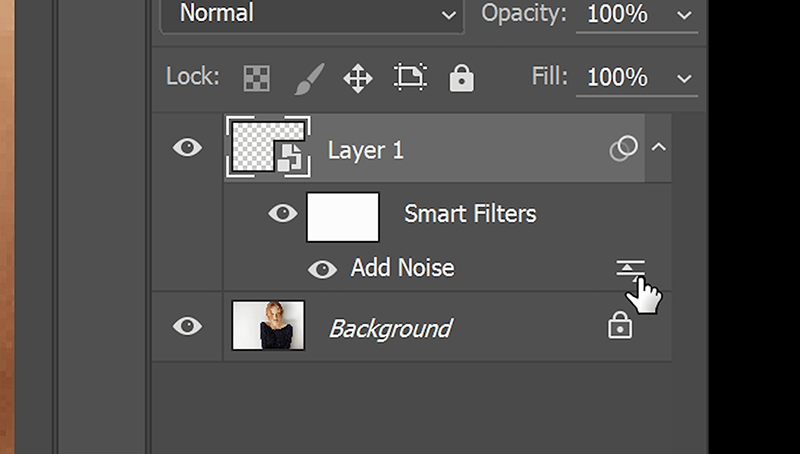

Yhe noise that we added has a very minimal effect to the overall image. And when you zoom out, you probably won’t notice the difference at all. This is just a technique that’s catered towards high-end retouchers who care a lot about image quality and maintaining a consistent sharpness and noise level throughout the entire photo.
Step 7
Right now the pupil looks fake. It really looks like someone just painted a dot over it. To make it look more realistic, we need to restore the reflections. If you look closely at the eyes, you’ll notice the reflection or catchlight. And it’s been completely covered by the fake pupil we added.

If we change the blending mode to something like overlay, it’ll look better but you’ll also get this double-pupil effect. You can also see that the reflection has a color that doesn’t look very real as well.

So we’re not going to use the overlay blending mode. We’re going to mask it out with the Blend If settings. Right-click on the layer, then choose blending options. On the bottom of the Layer Style window, you’ll find the blend if settings. We’re going to use the Underlying Layer option, and if we drag the white slider towards the left, you can see the reflection coming back.
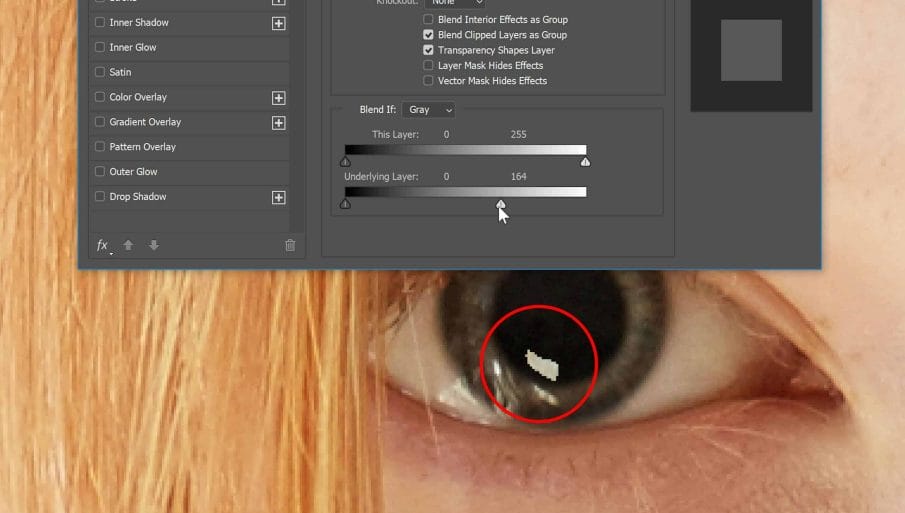
Now the edges of the reflection are quite hard, so to soften it, hold the Alt/Option key then drag the white slider towards the right. The slider will detach in half and you can fade out the edges like this.
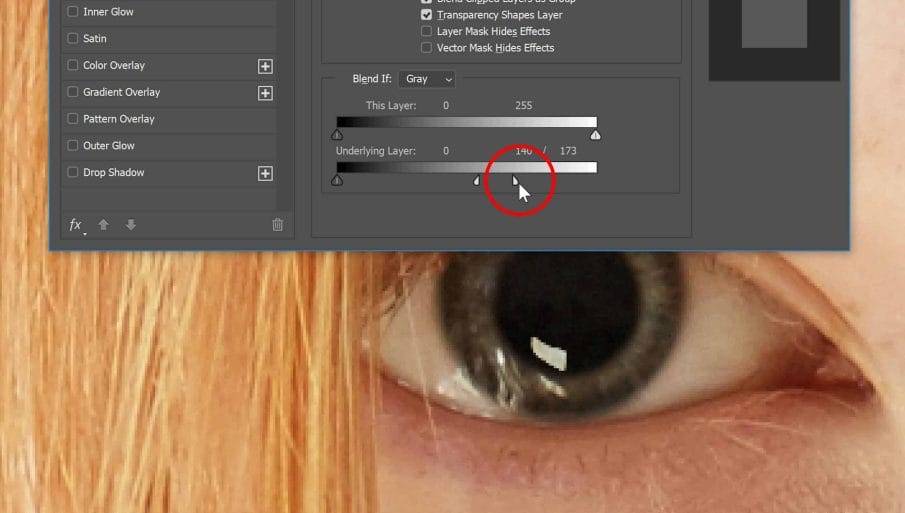
Click OK to apply the changes and we’re done. The pupils are much more realistic once the reflections are restored.

Step 8
We’re done with one eye. Now it’s time to work on the other eye. I’m going to go through this quickly because you already know the steps but along the way you’ll learn some pretty useful tips and tricks.
First I’m going to select the background layer and make a selection of the pupil.

Step 9
Apply the same feather setting by pressing Shift+F6. The previous setting we used should still be here so we can just click OK.

Step 10
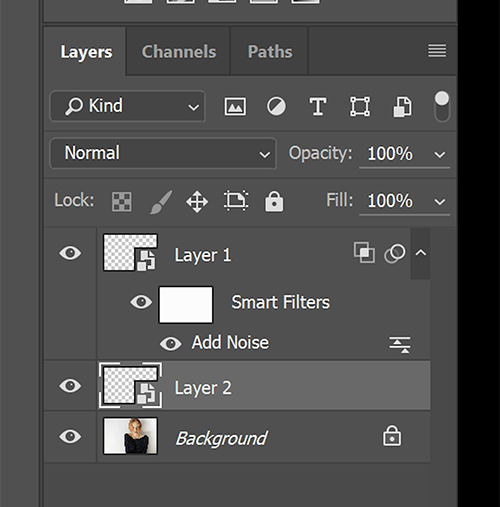
Press Ctrl or Cmd J to duplicate the layer. Convert it into a Smart Object by right-click on the layer and selecting Convert to Smart Object.
Step 11
Press Ctrl or Cmd T for the Transform tool. Resize it to about the same size as the other pupil.
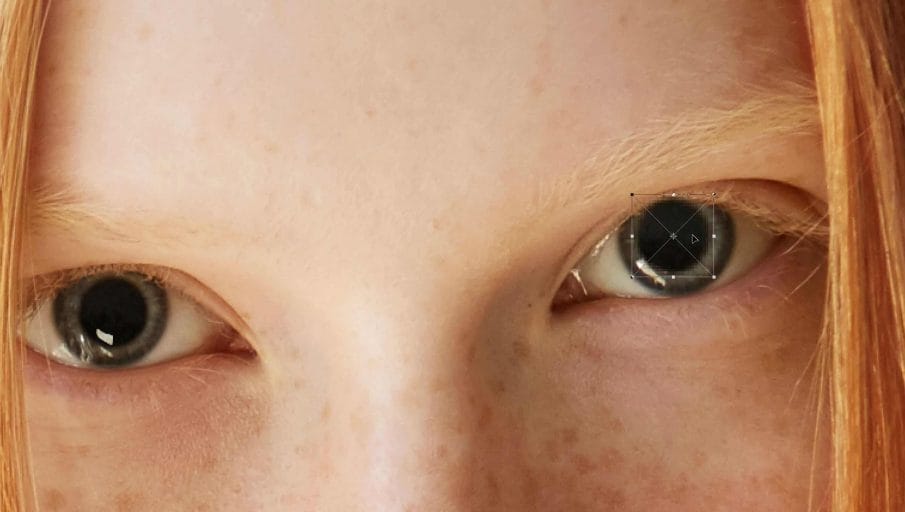
Step 12
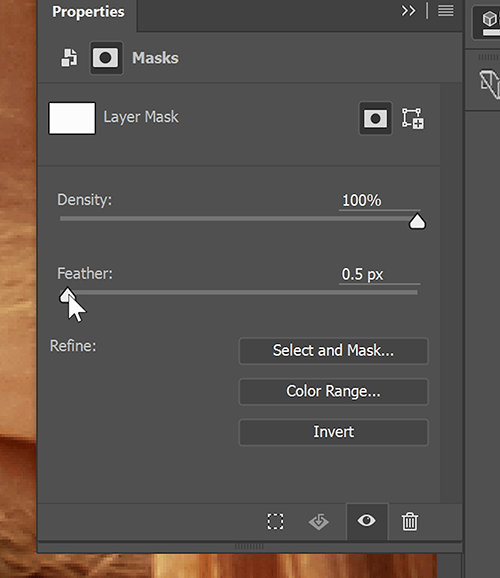
If the pupil is extending past the eyelid, you can fix it by clicking on the Add Layer Mask button in the Layers panel. Select the eraser tool, and if your foreground and background colors are the default black and white, it should paint your layer mask with black. If you’re using the Brush tool, you’ll need to swap the colors by pressing X. I’m going to erase very carefully around here.

My brush hardness is set to 100% so the edges look hard. To soften it, go to the Properties panel and adjust the feather setting. Compared to setting the feather in your brush settings, it’s not that big of deal. It’s just good practice because it’s always easier to blur something than it is to sharpen it back.
Step 13
Next we’re going to restore the noise. But first, make sure that you’ve selected back the layer by clicking on the layer thumbnail. Otherwise your noise will be applied to the layer mask instead.
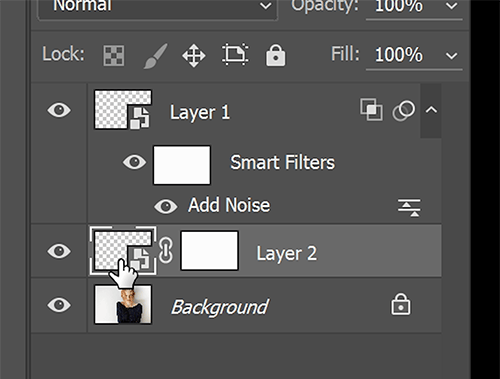
Go to Filter > Noise > Add Noise. Your previous settings should still be here so just press OK.

Step 14
In the Layers panel, doubleclick on this icon here to bring up the Blending Option.

Use the same opacity setting you used for the other pupil… for mine it was 50%.

Step 15
And finally, we’re going to restore the reflections. You can just copy and paste the layer style by right-click on the other layer and selecting “Copy Layer Style”.

Right-click on the previous layer and then choose “Paste Layer Style”. The reflection is restored and we’re done.

Final Results
So there you go, that’s how you dilate pupils in Photoshop. One thing to noticed here is that everything we did was not only just nondestructive, it’s fully editable as well. So you can always see what was done and edit the settings in the future.
Here’s what the image looks like before and after. Does it look more appealing to you or is it not really that big of a deal? Let me know what you think by leaving a comment.
