There have been huge improvements to Lightroom presets this year. But you can’t experience it because your Lightroom presets are out-of-date. Almost all preset packs, including new ones, are not up-to-date. And the main reason is that nobody knows how to create these new presets. There is a secret tool so hidden, you probably didn’t even know it exists. In this tutorial, I’ll show you how to find this hidden tool and how to upgrade your old Lightroom presets.
What’s New with Presets?
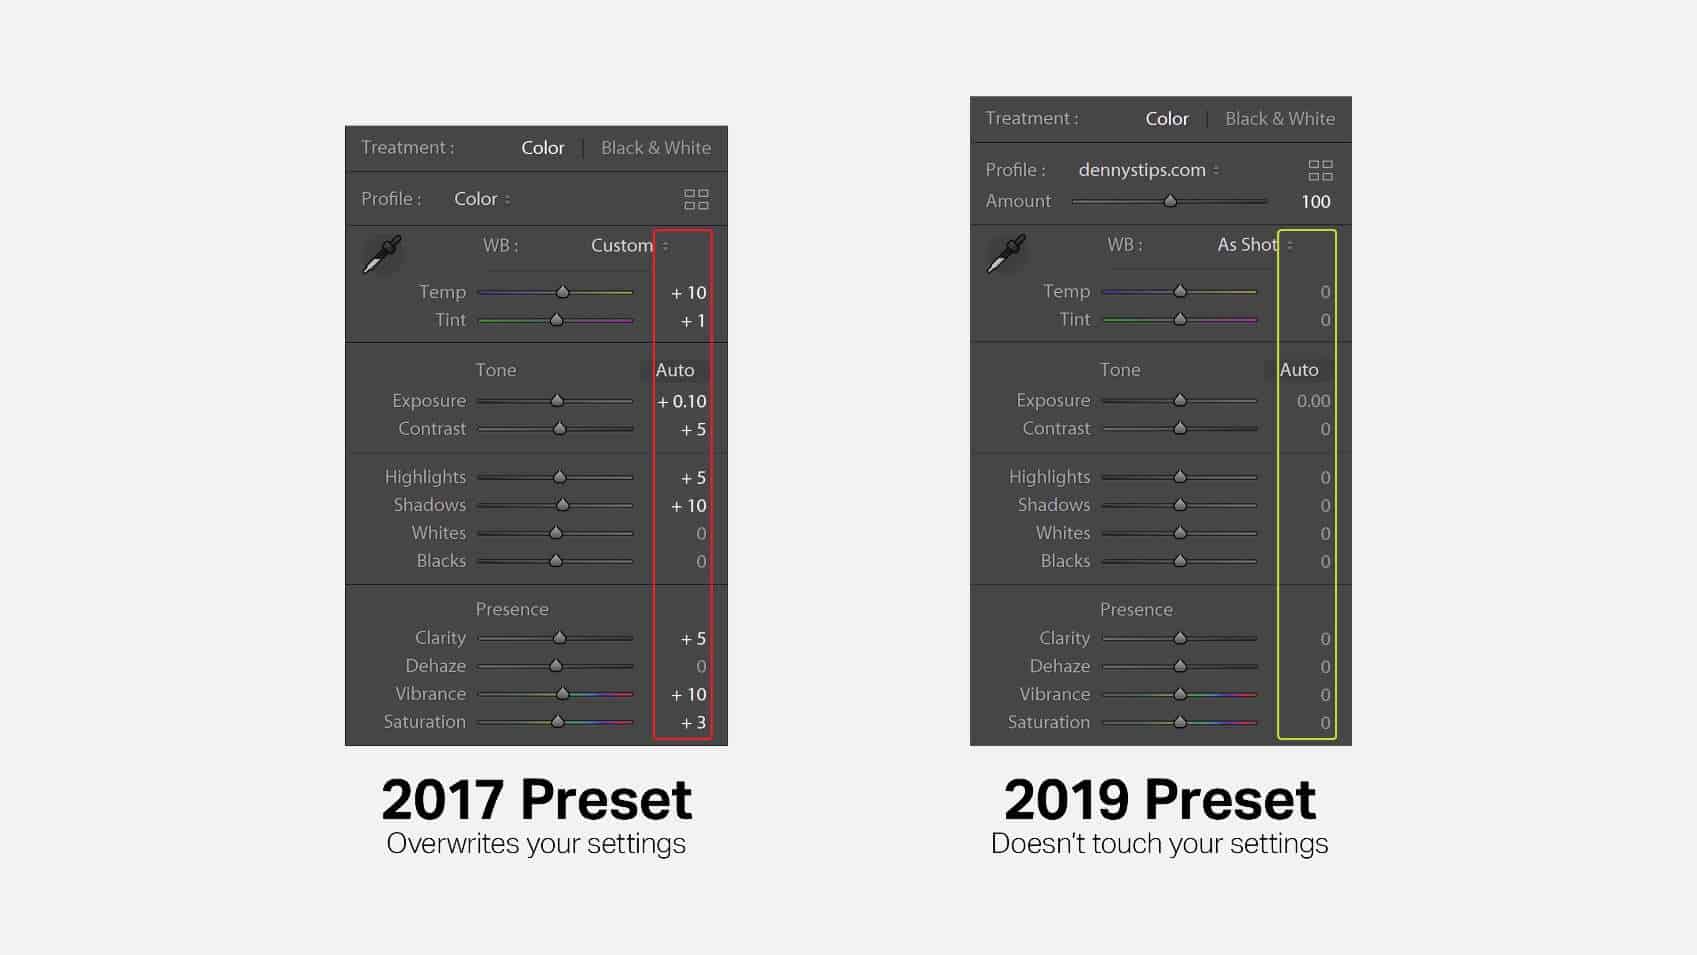
First, you need to know what’s new with Lightroom presets. Here’s a Lightroom 2019 preset. In the develop settings, you’ll see that it uses very few settings. The biggest problem with Lightroom presets was that they were destructive. They overwrite your develop settings and force you to use a “preset-first” approach. There were ways to create lightweight presets that were less destructive. One of which is by combining settings into an RGB tone curve. But most people don’t know how. This was a huge problem that needed solving so Adobe came up with profiles. You can now create nondestructive presets by compressing everything into a profile. And it is easy to do as you’ll see in this tutorial.
Another important feature is opacity control. Most of the time, presets are either too strong or light. For the longest time, people have been asking for a way to control the opacity of their presets. This is now built-in to profiles and you don’t need any 3rd party plugins.
Step 1 – Open the Camera Raw Filter in Photoshop
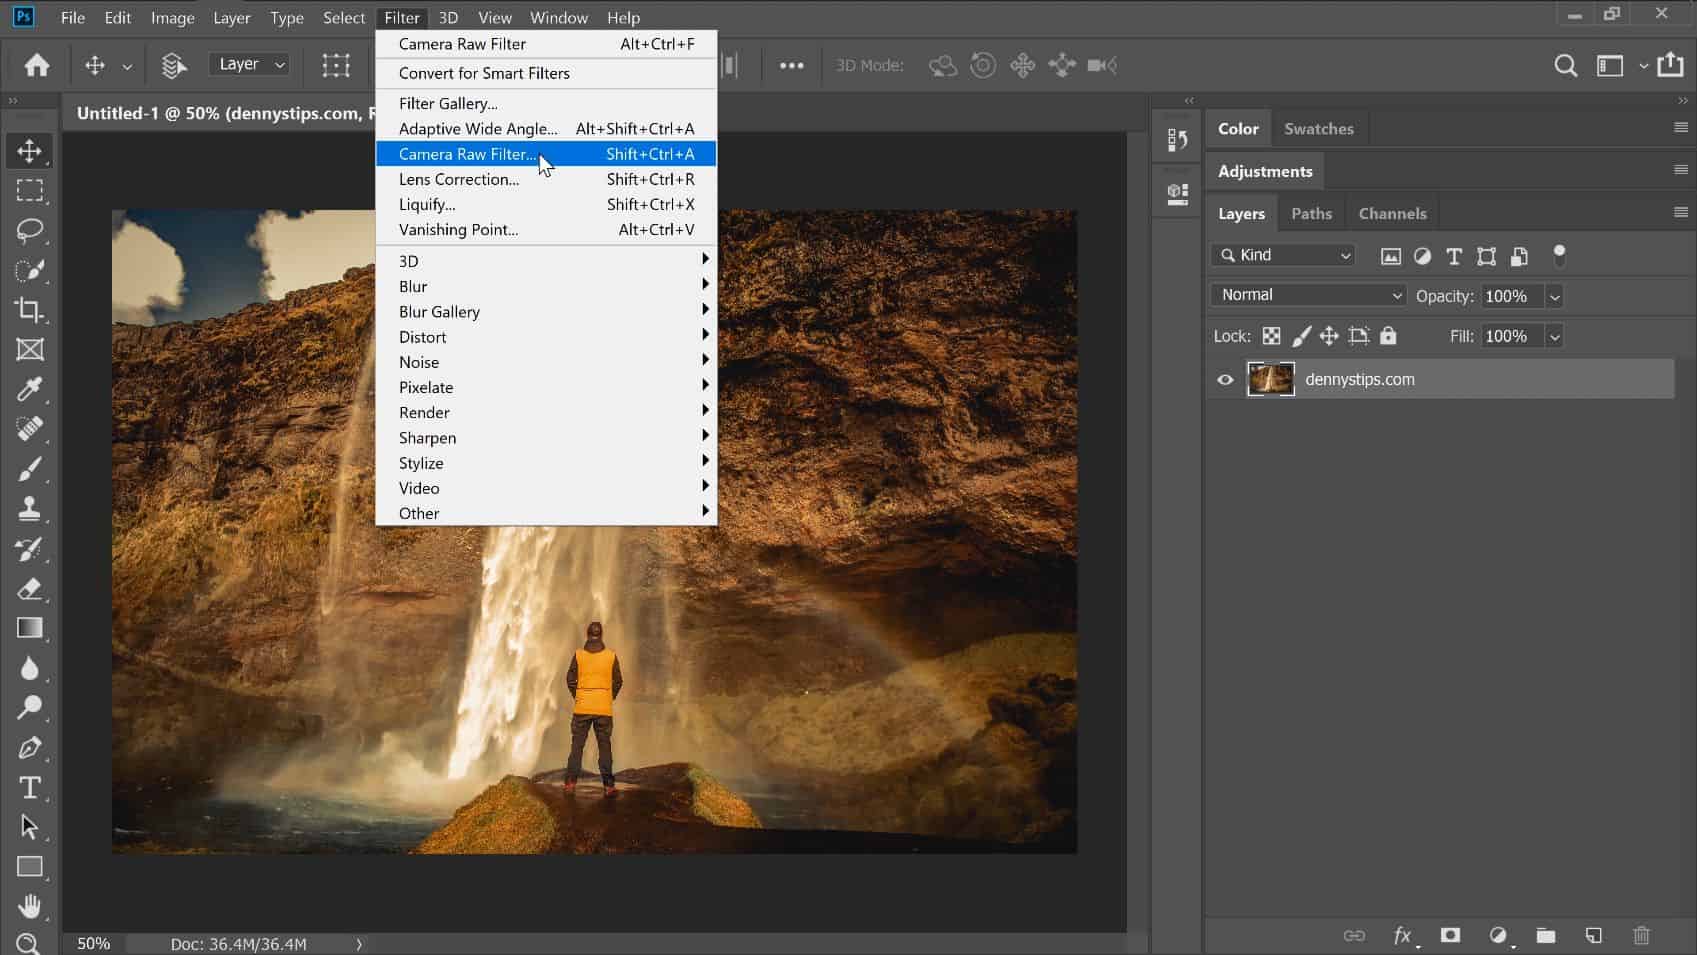
Now that you know the benefits, let’s learn how to do it. To upgrade your presets you’ll need to use Photoshop CC. In Photoshop, open any photo. Next, go to Filter > Camera Raw Filter.
Step 2 – Apply the Preset
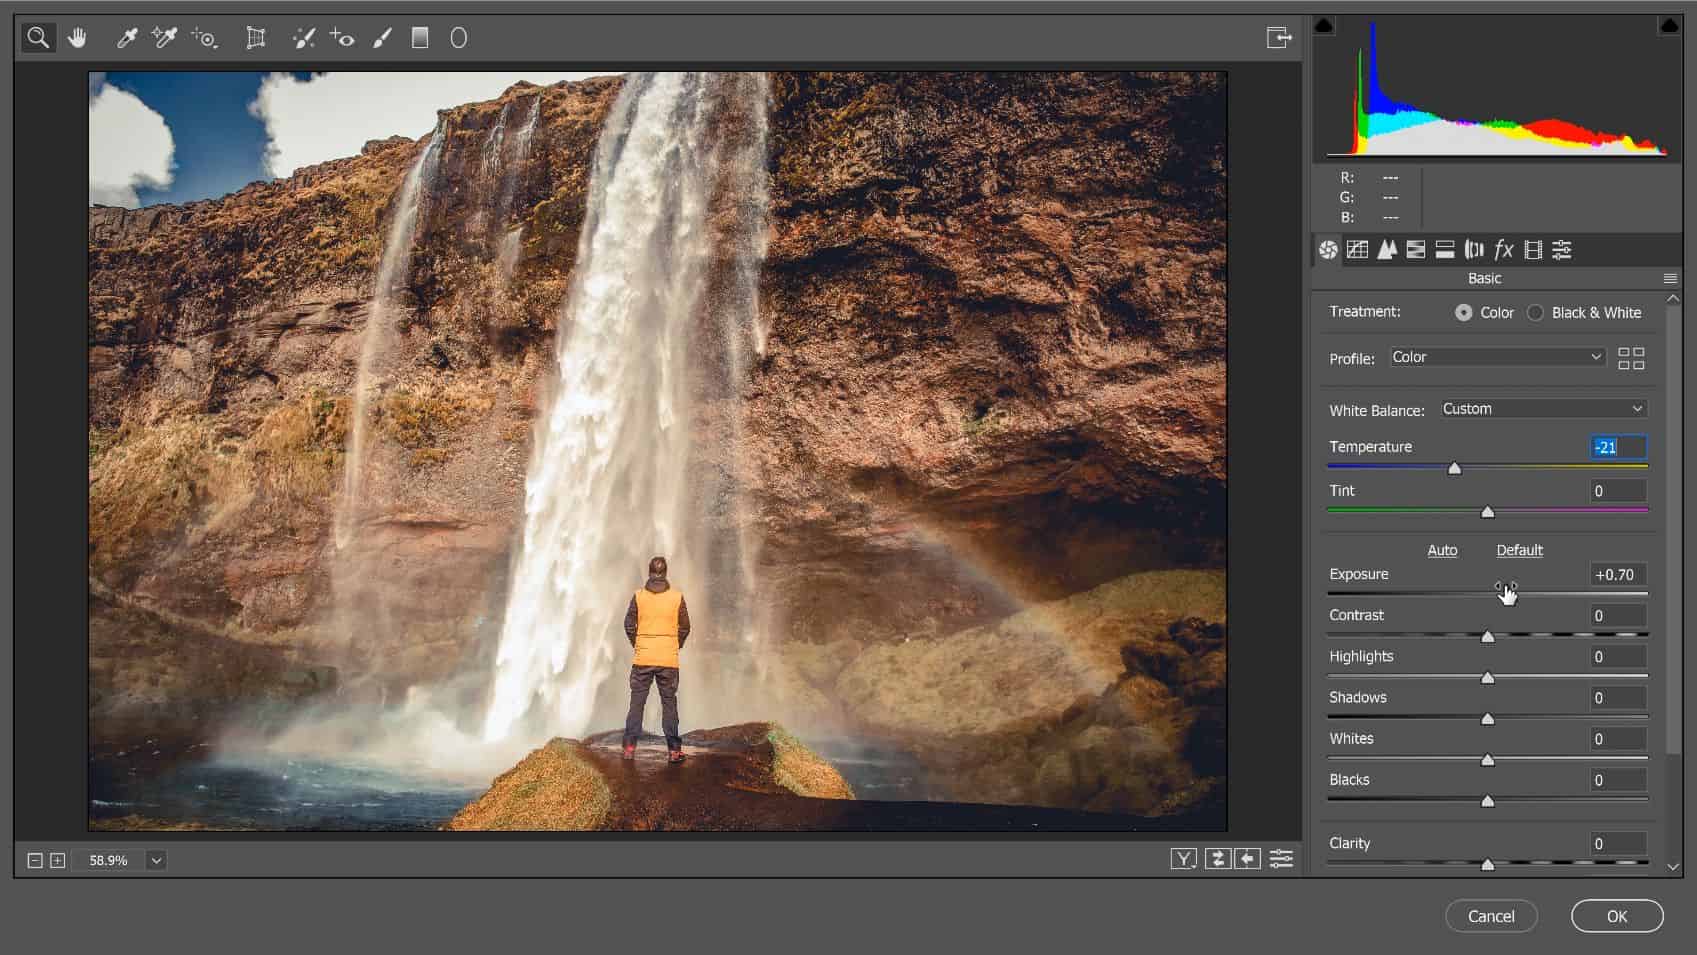
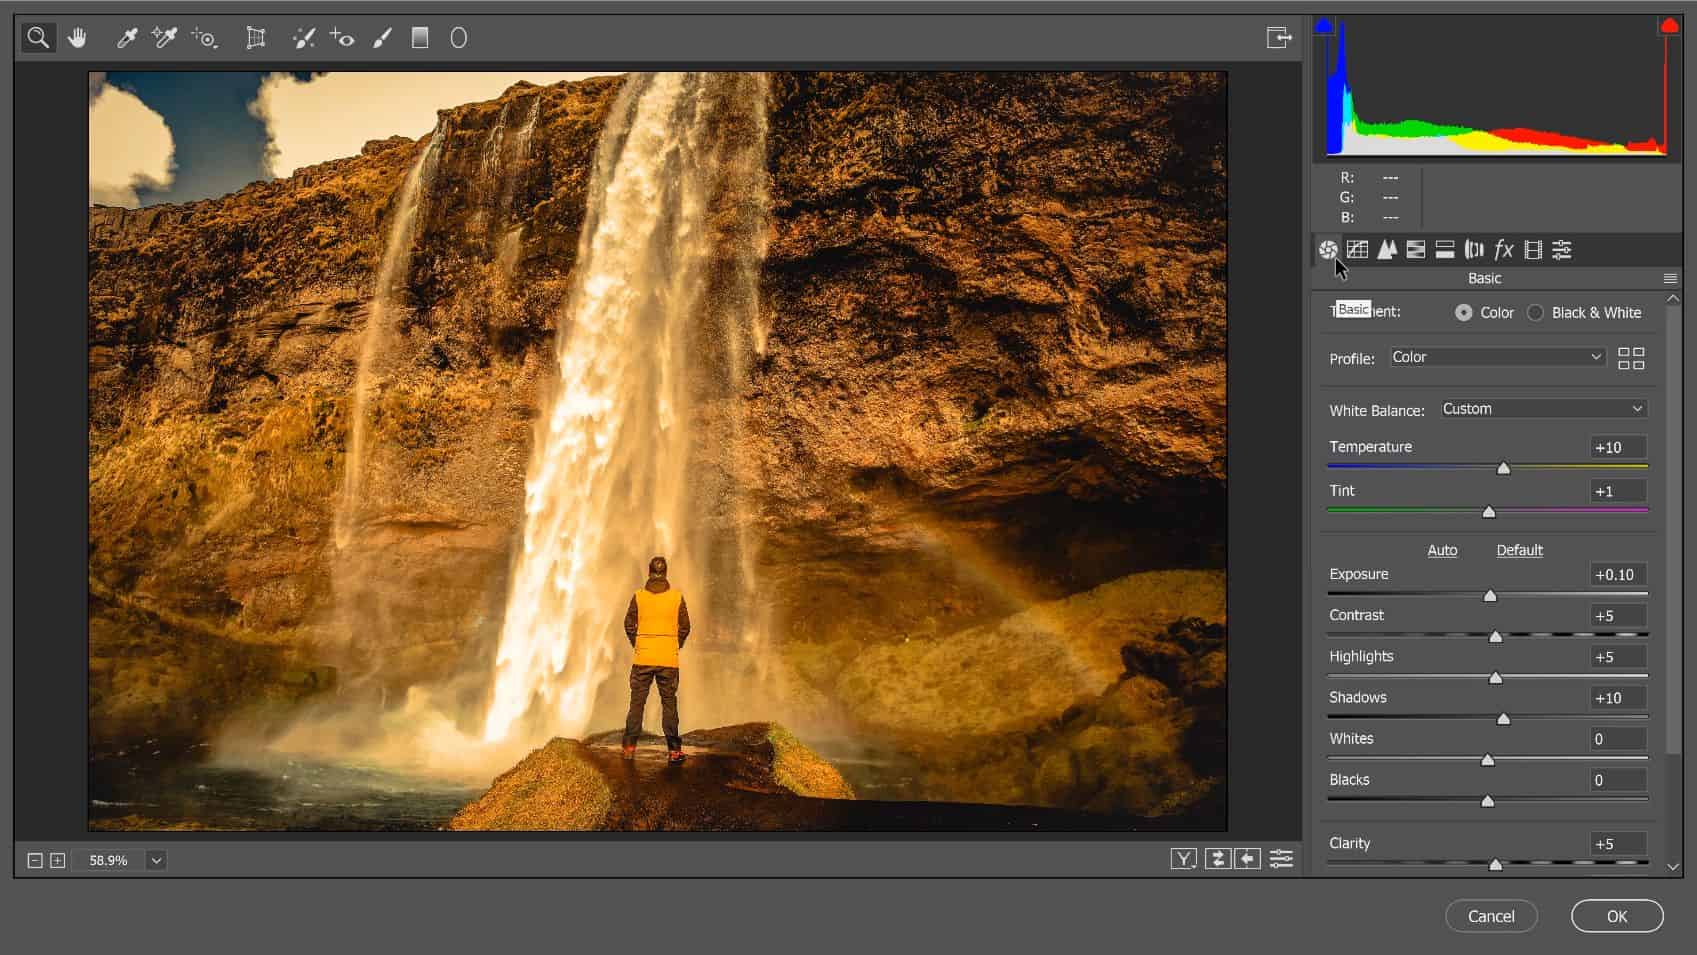
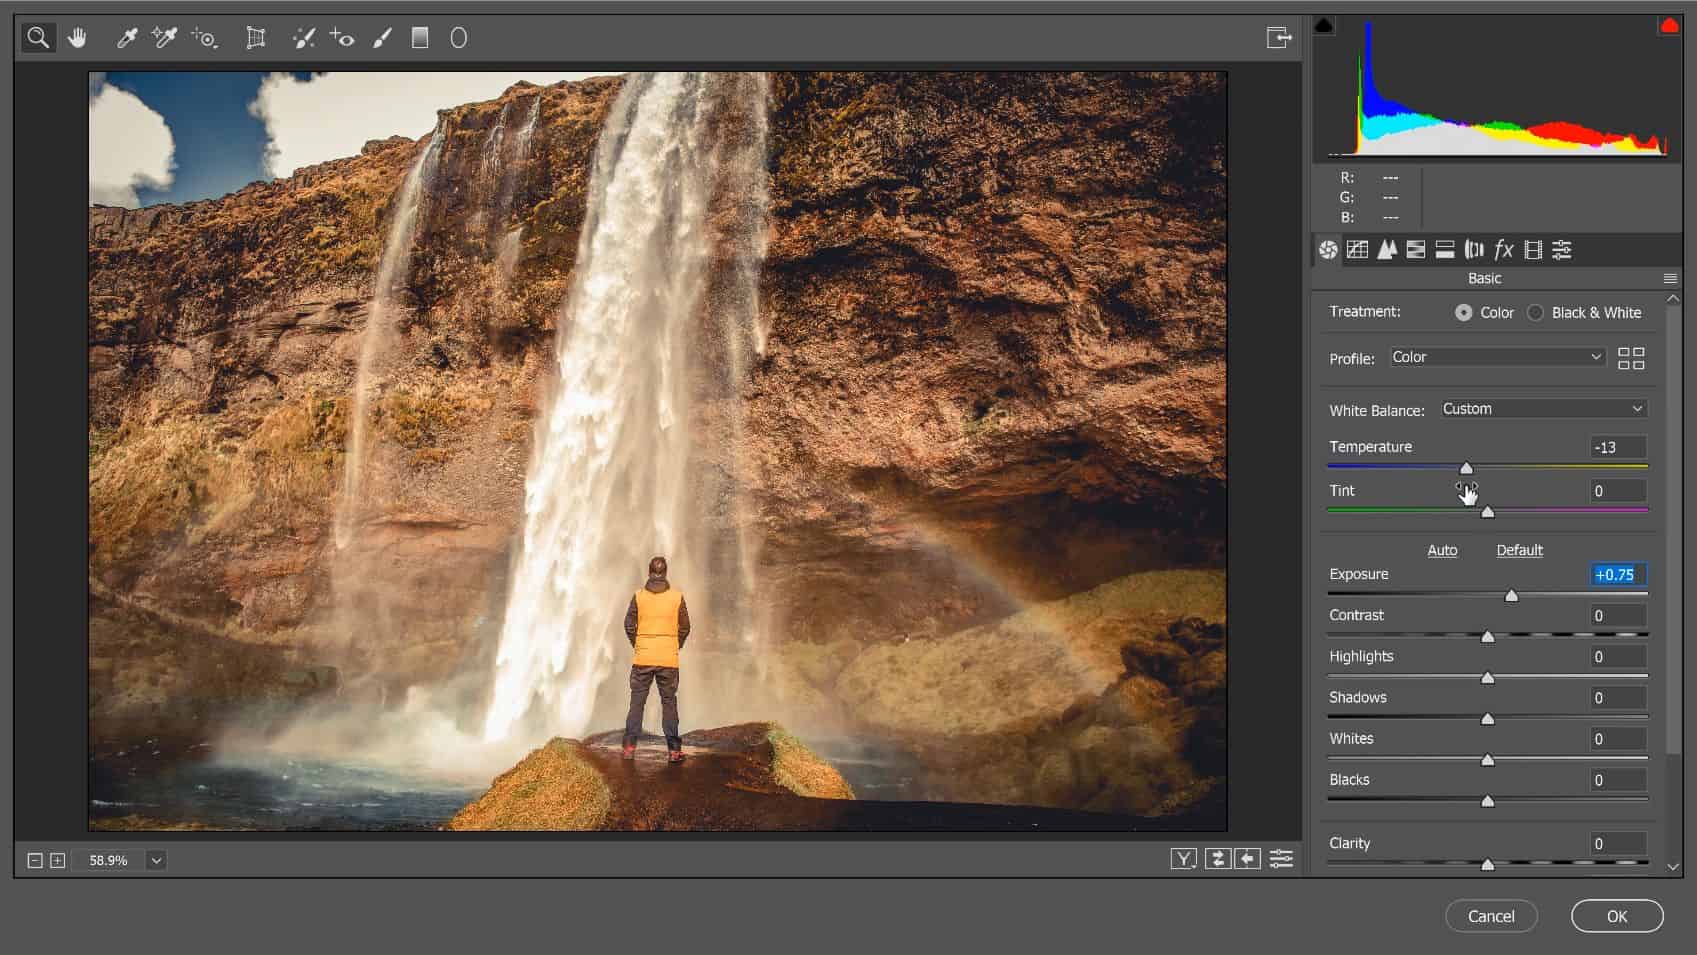
Before we continue, I’m going to fix the white balance and exposure. You don’t have to do this. I’m doing it as an example and I’ll show you why later.
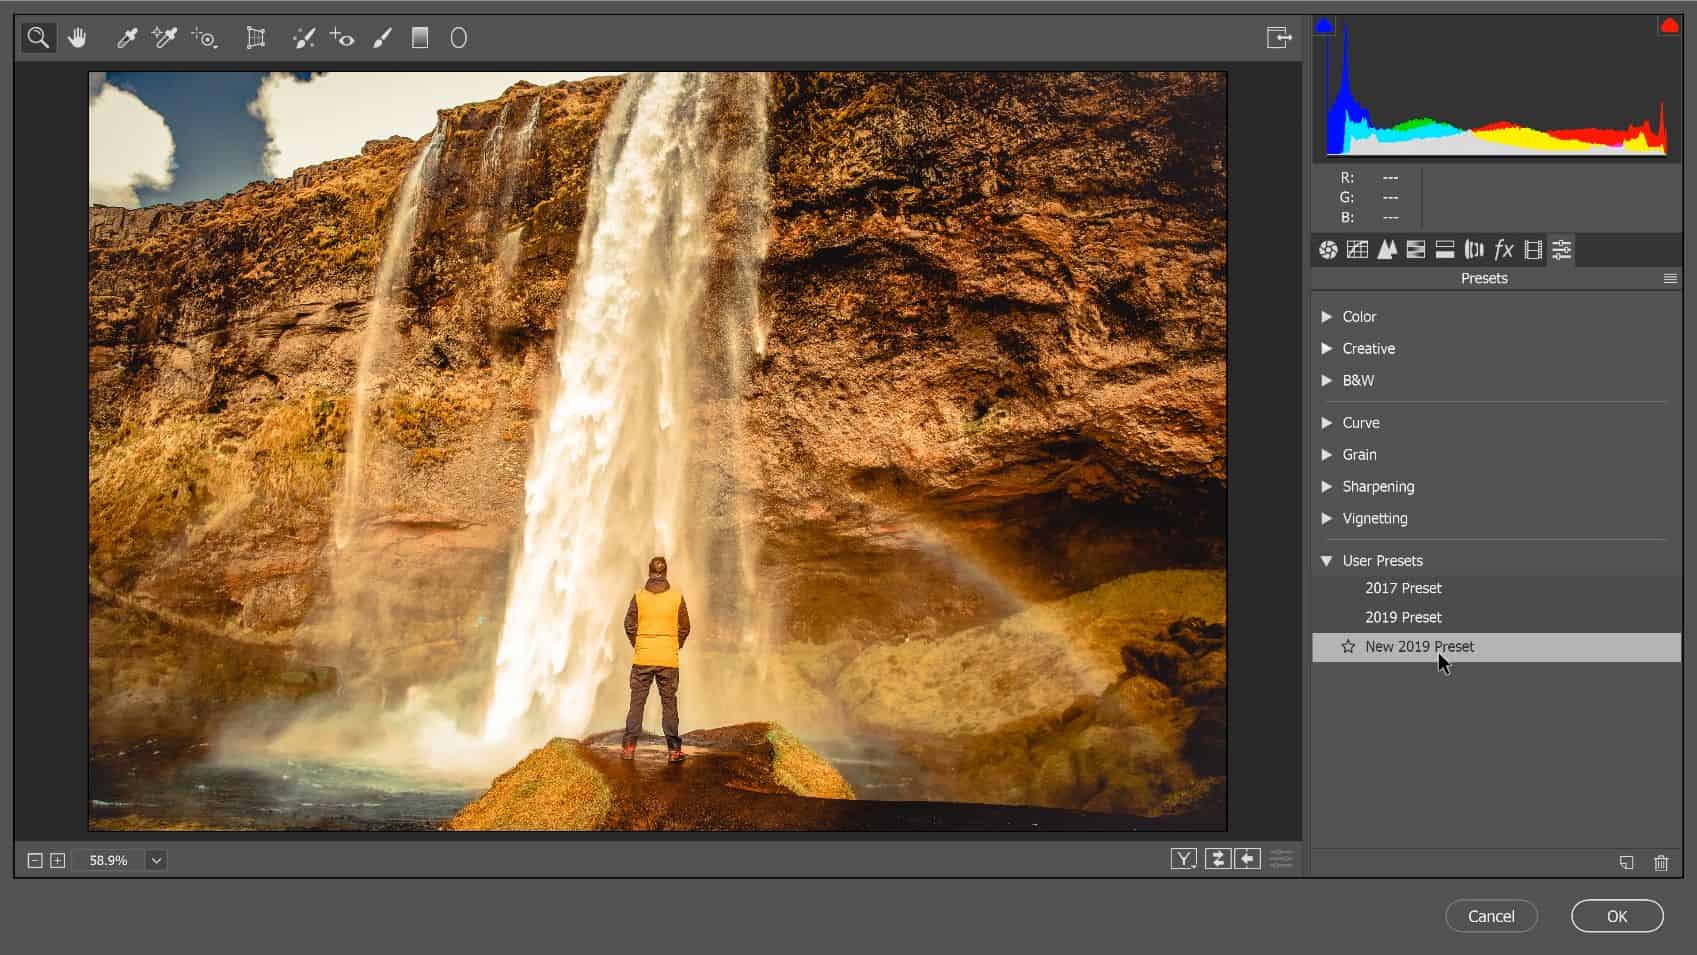
Switch to the Presets tab and select the preset you’d like to upgrade. Here’s a preset that I’m going to apply. By the way, this is a premium paid preset. I’ve anonymized the preset name to protect the creator’s brand. Once I apply this preset, you’ll notice that my photo got dark and the white balance is off. This is an example of a destructive preset.
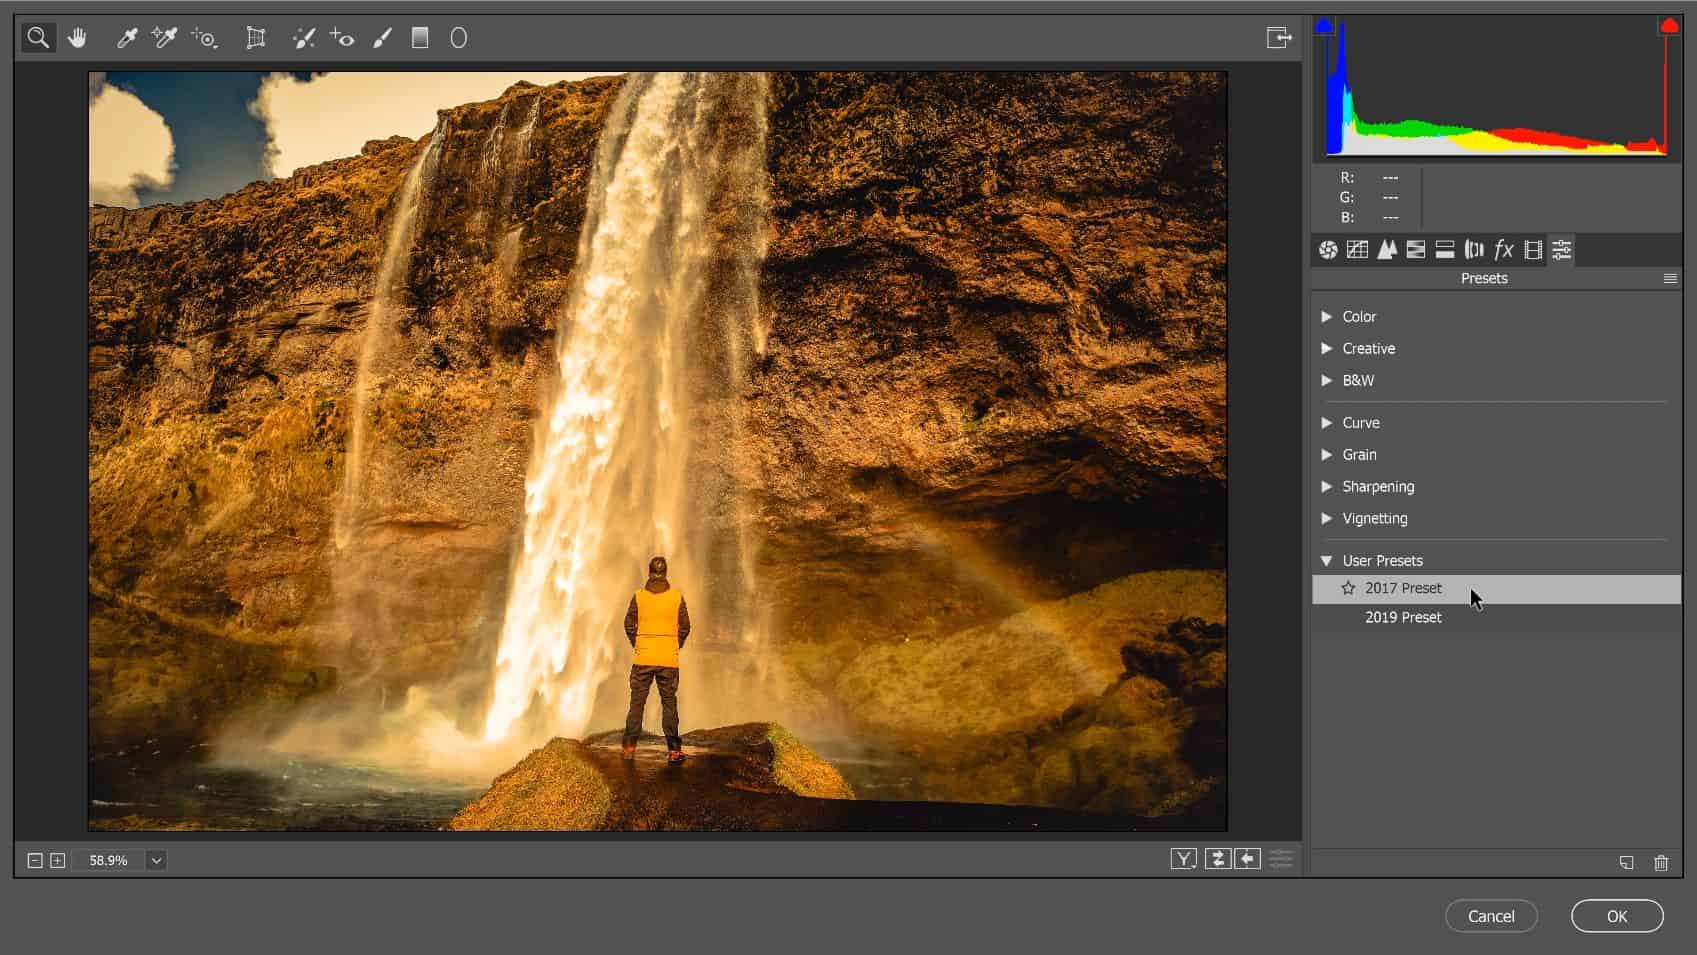
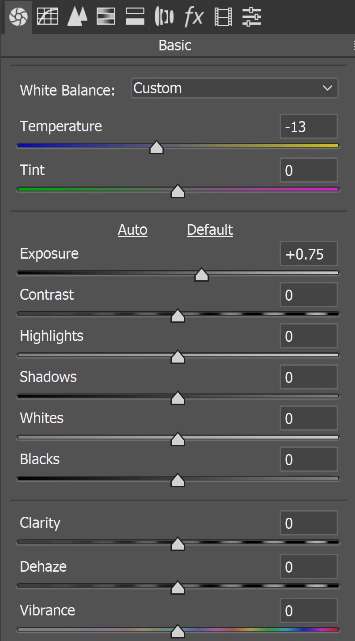
Here’s what’s going on. If we go into the settings, you’ll see that it changes the white balance and exposure. This means that I have to correct the photo again which is a huge waste of time.
Step 3 – Create a New Profile
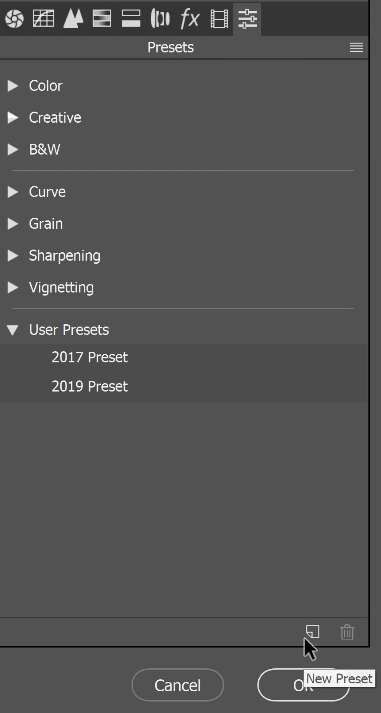
To create a profile, go to the Presets tab. If you click on the New Preset button, it’ll let you create a preset. But where’s the button to create a profile?
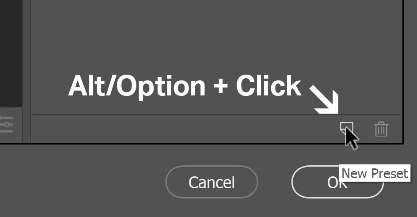
Here’s the secret. Hold the Alt key (Option on Macs) then click on the New Presets button.
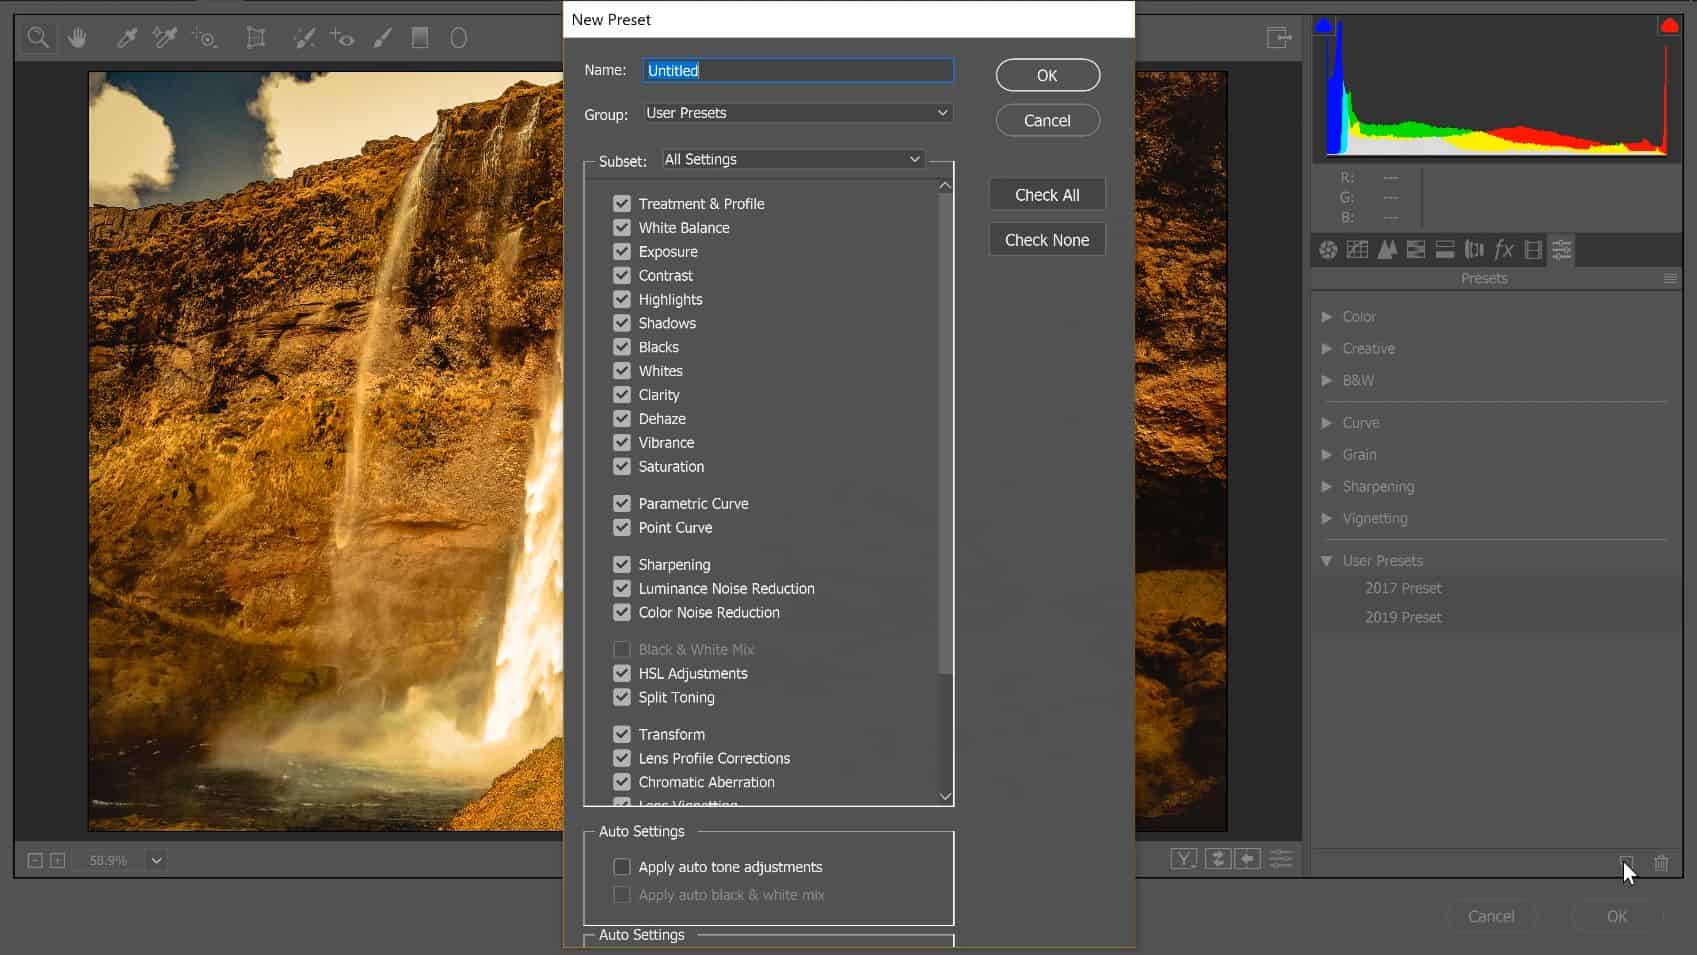
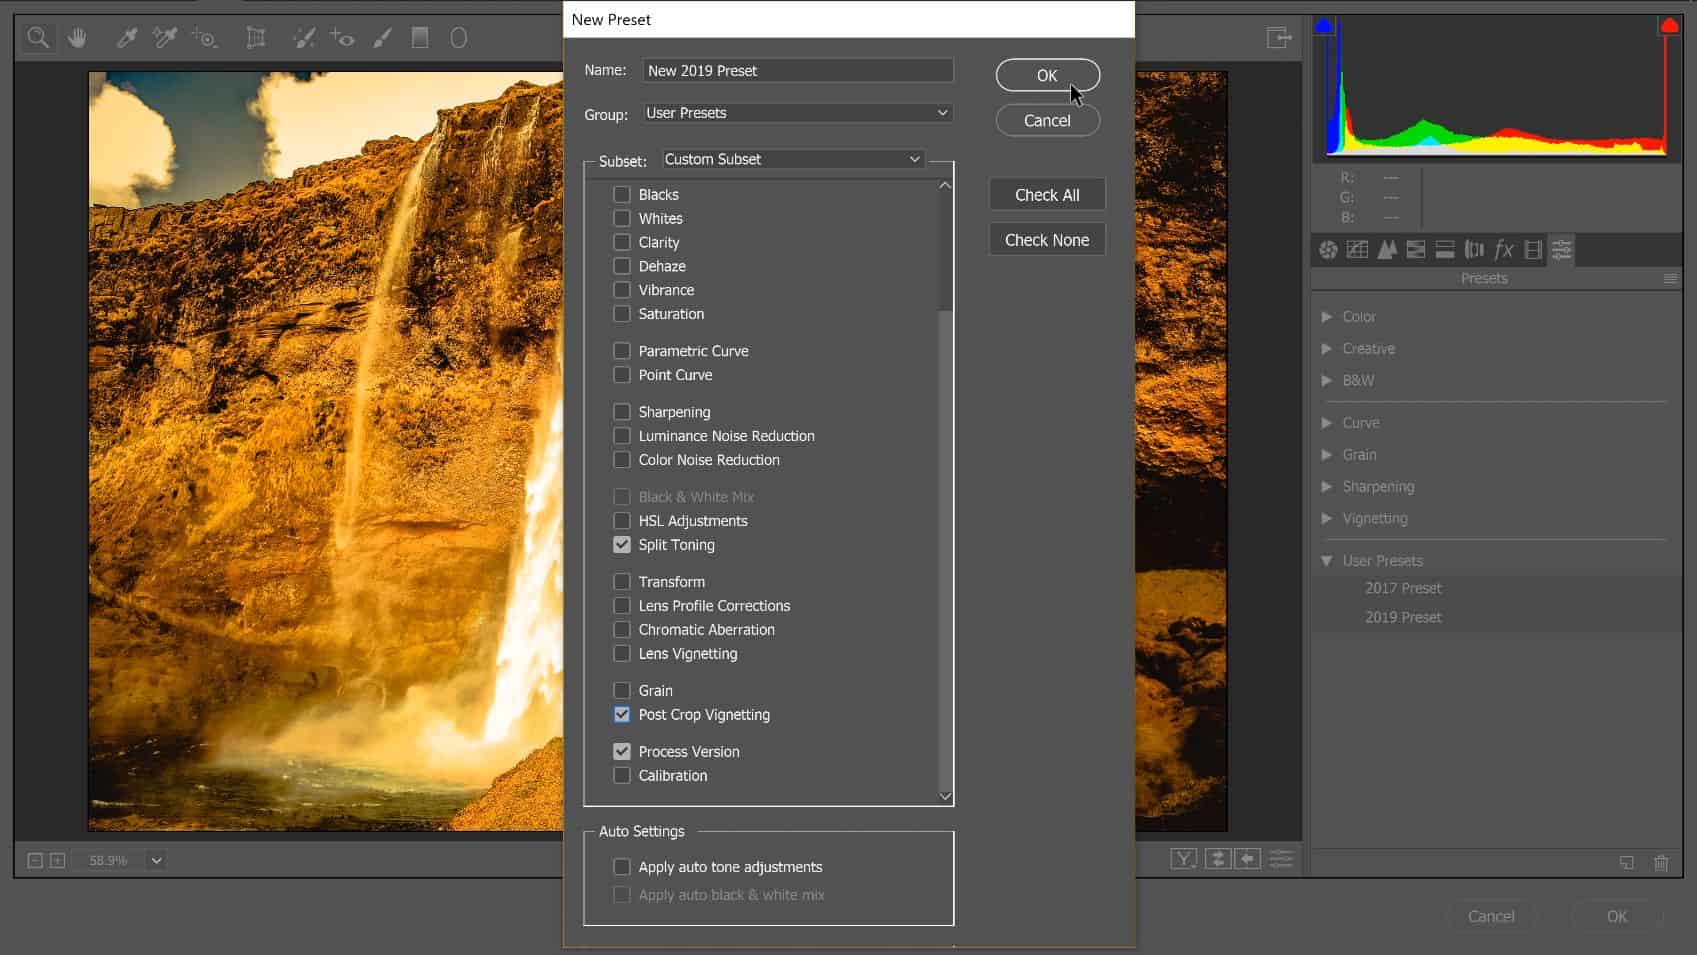
You will notice a different window that says “New Profile” on the top. Give your profile a name. If you want to put it into a different group, you can click on the drop-down menu and select “New Group”.
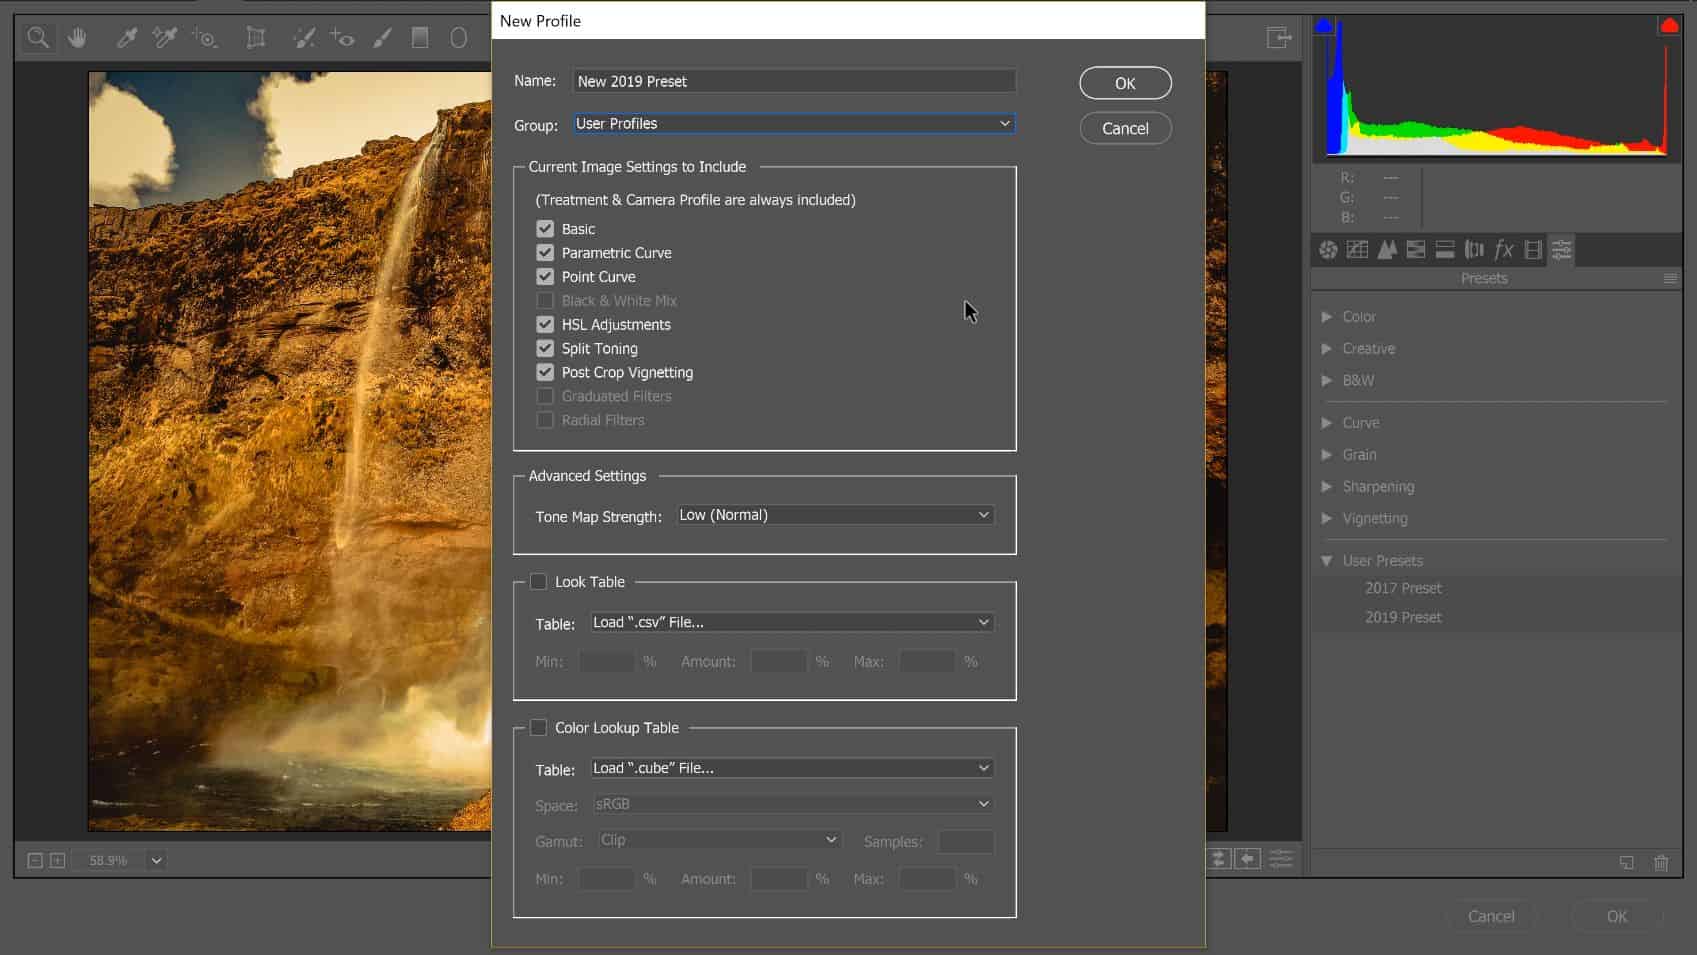
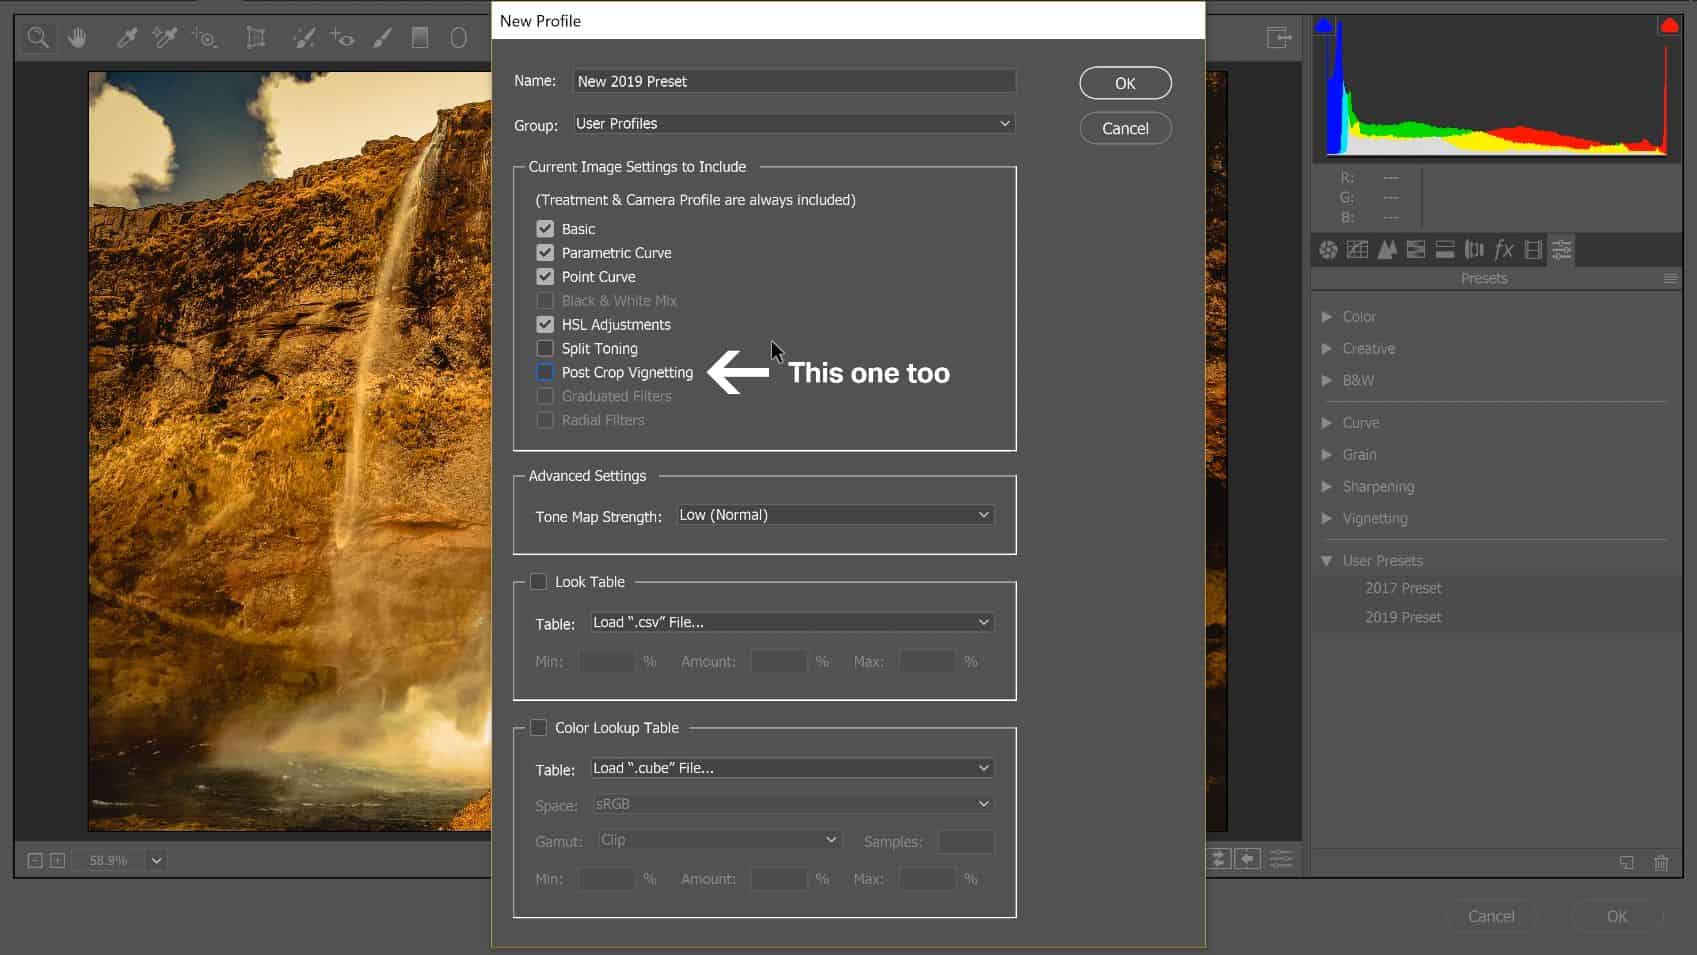
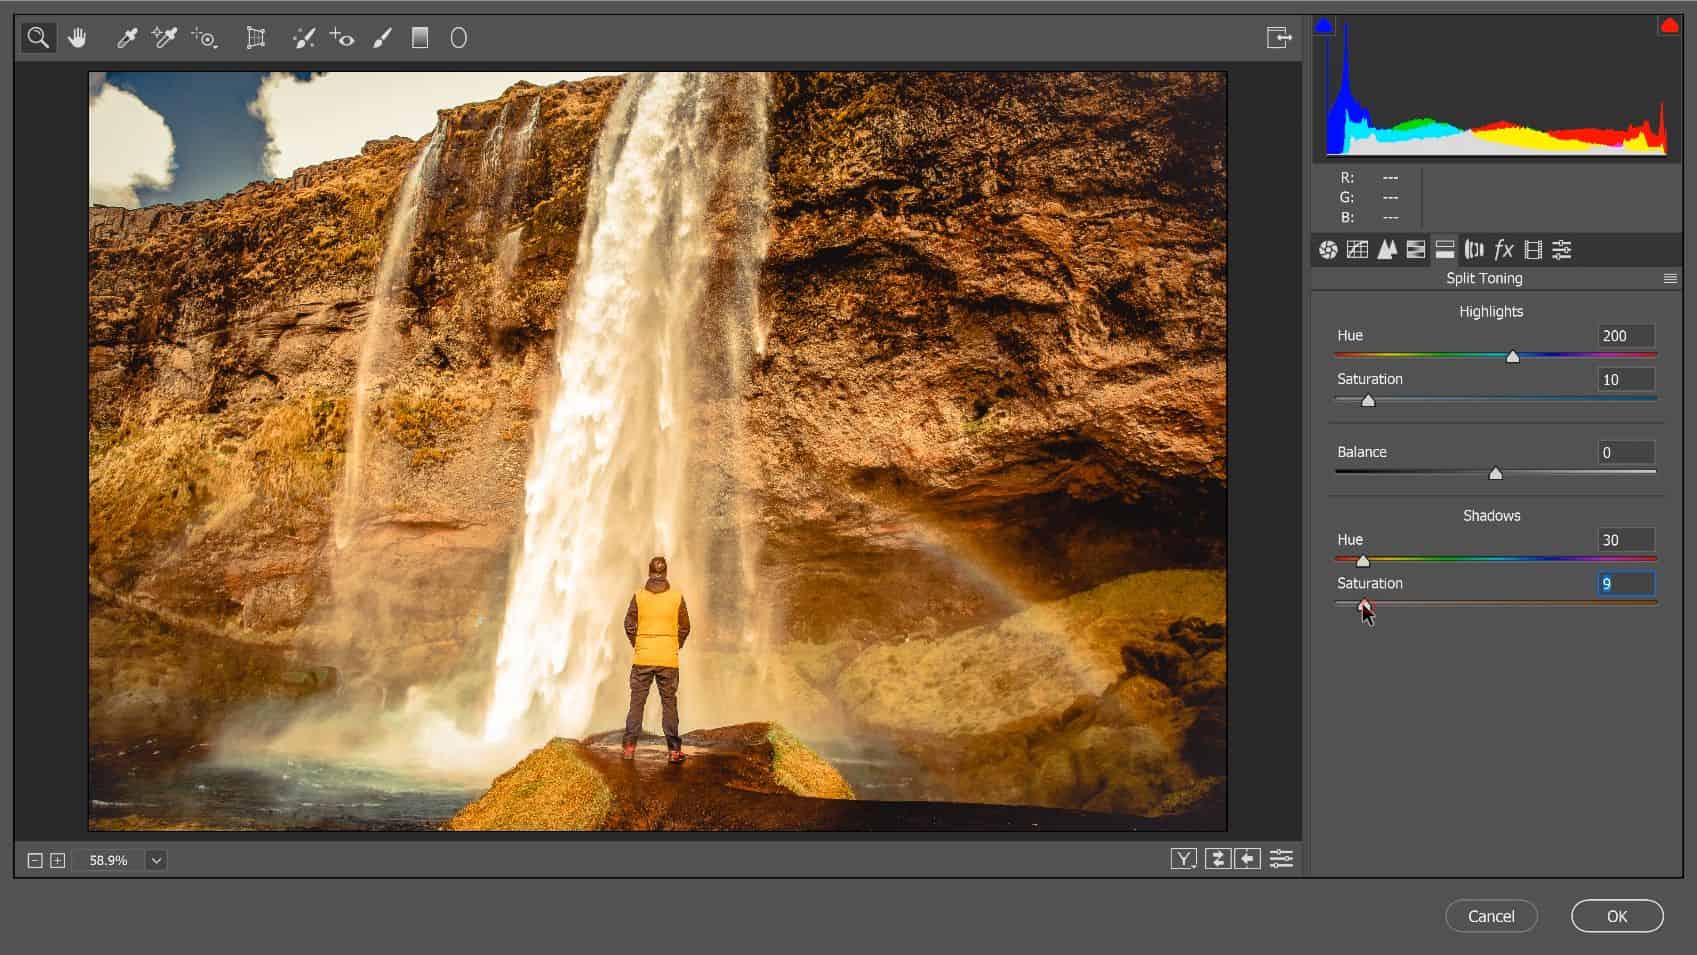
Next, uncheck any settings that you do not want to move into the profile. The settings you move into a profile cannot be changed. For example, I’m going to move everything except for Split Toning. This is because I still want the Split Toning to be adjustable.
There are more settings below. They’re used in more advanced presets. But for the goal of this tutorial, we don’t need to use it. Click OK to save your profile.
Step 4 – Apply Your Profile
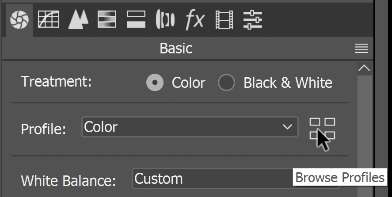
We created a profile and now let’s find it. Go to the Basics tab and then click on the profile browser button.
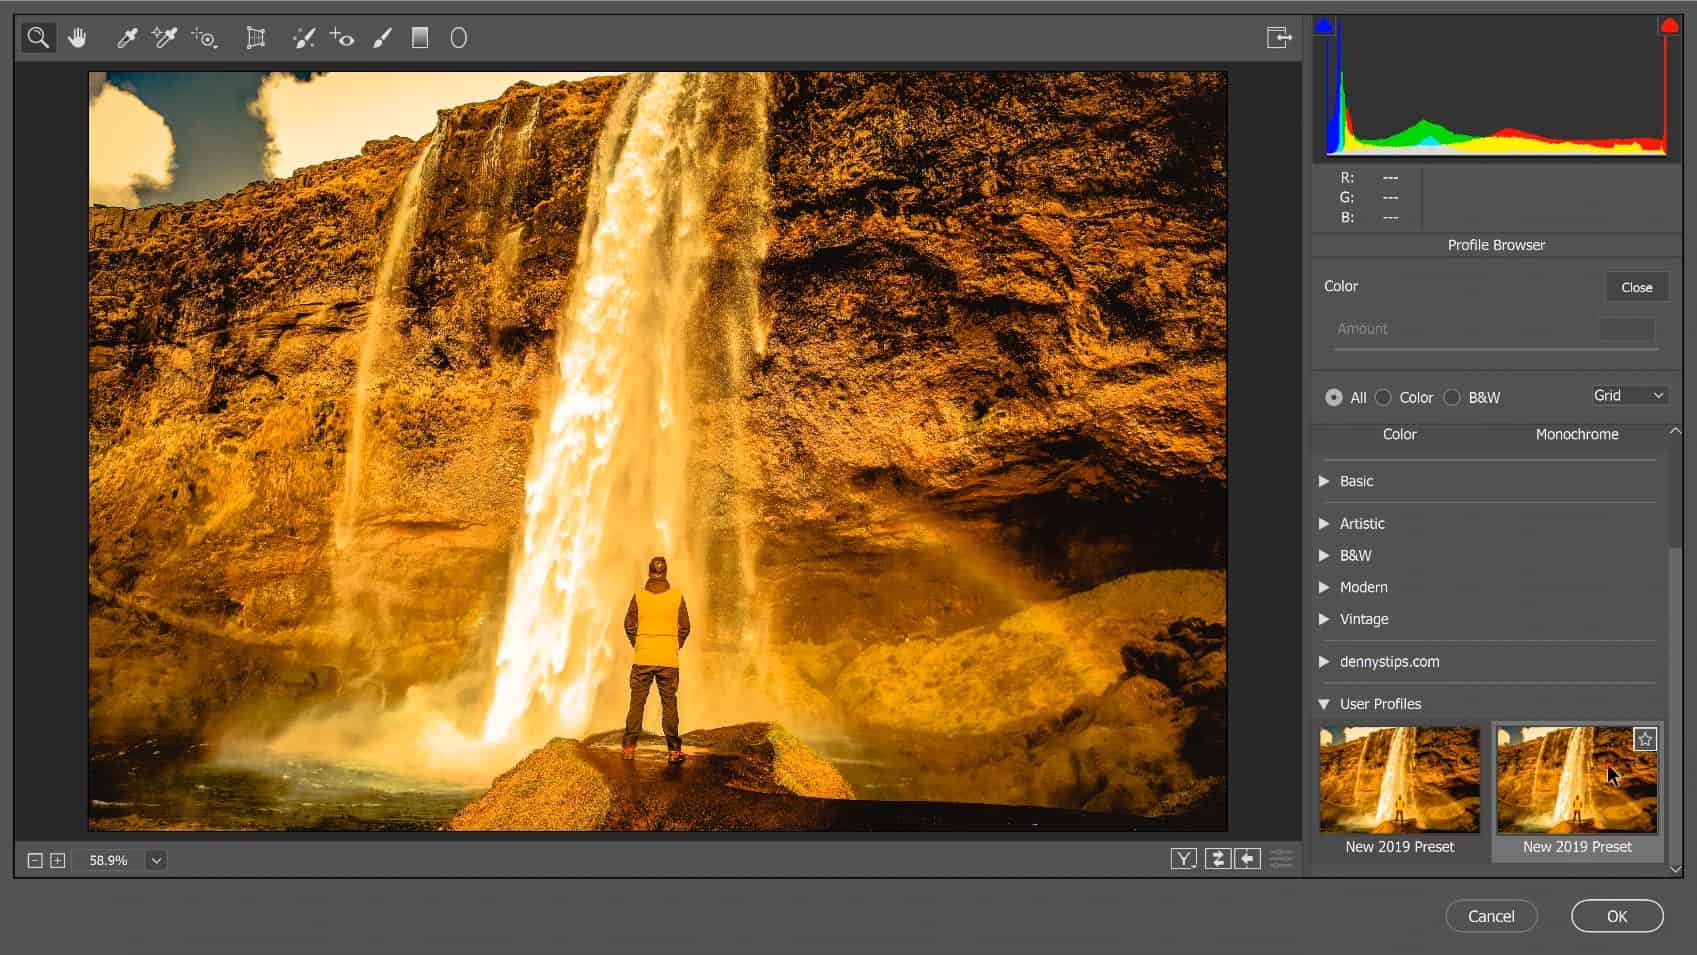
Find the profile that you created and apply it. Then, click on the Close button to go back. Don’t worry if your photo looks overprocessed – it’s temporary and you can ignore it for now.
Step 5 – Save a New Preset
Now we’re going to save this as a new preset. Go back to the presets tab. Click on the New Preset button, but this time, don’t hold the Alt/Option key while doing it.
Give your preset a name and put it in a group if you like. There’s a lot of settings here but you should only checkmark the ones that are used. To do this, click on the “Check None” button to uncheck everything. Now, checkmark “Treatment & Profile” and “Process Version”. If there are any settings that you didn’t include in the profile, checkmark those too. For mine, it was the Split Toning. Click OK when you’re done.
Step 6 – Test Your Preset
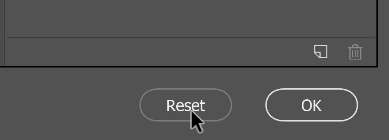
Now it’s time to test your preset. First, reset all the settings back to normal. You can do this by holding Alt/Option and clicking on the Reset button.
I’m going to fix the white balance and exposure before we apply the preset just as an example.
Now, go back to the Presets tab and find the preset that you created. You’ll notice that this time when I apply the preset, the color correction I made is still here.
And looking in the develop settings, you can see all the sliders untouched.
Do you remember earlier when I unchecked the Split Toning option in the profile and put it back in the preset? If we go into the Split Toning section, you can see that the setting is still here to adjust.
Step 7 – Test Your Profile
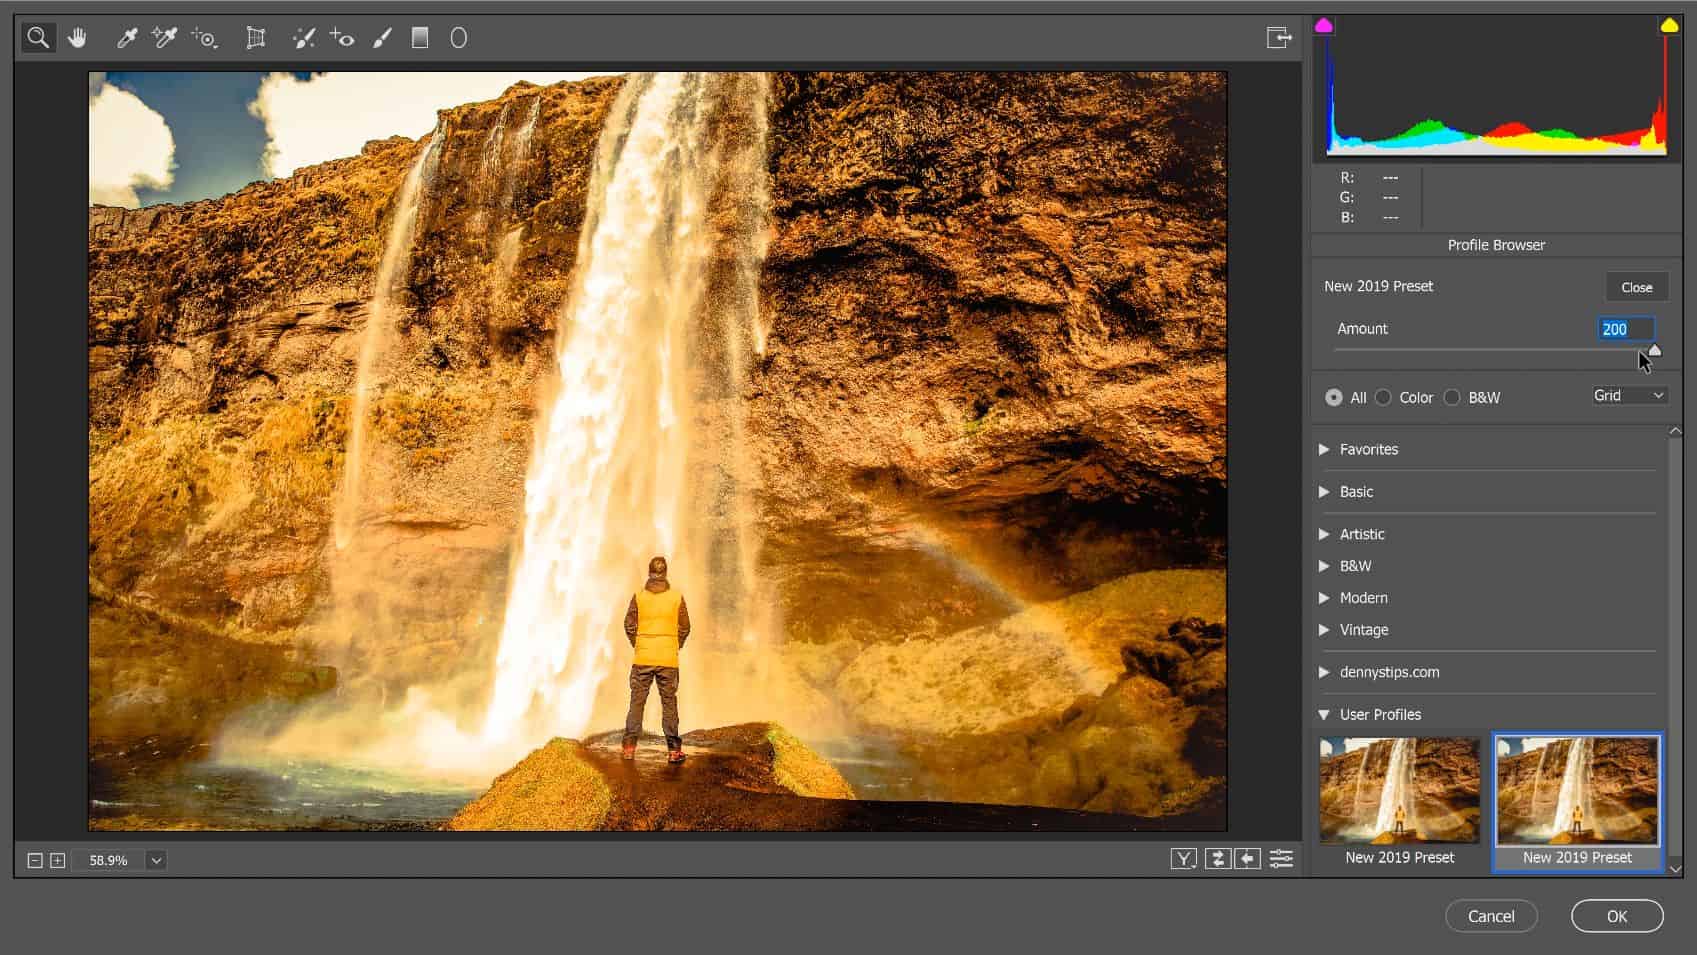
You might be asking, where are all the settings for this color grading? I’m glad you asked. Go into the Basics section and click on the Profile browser button.
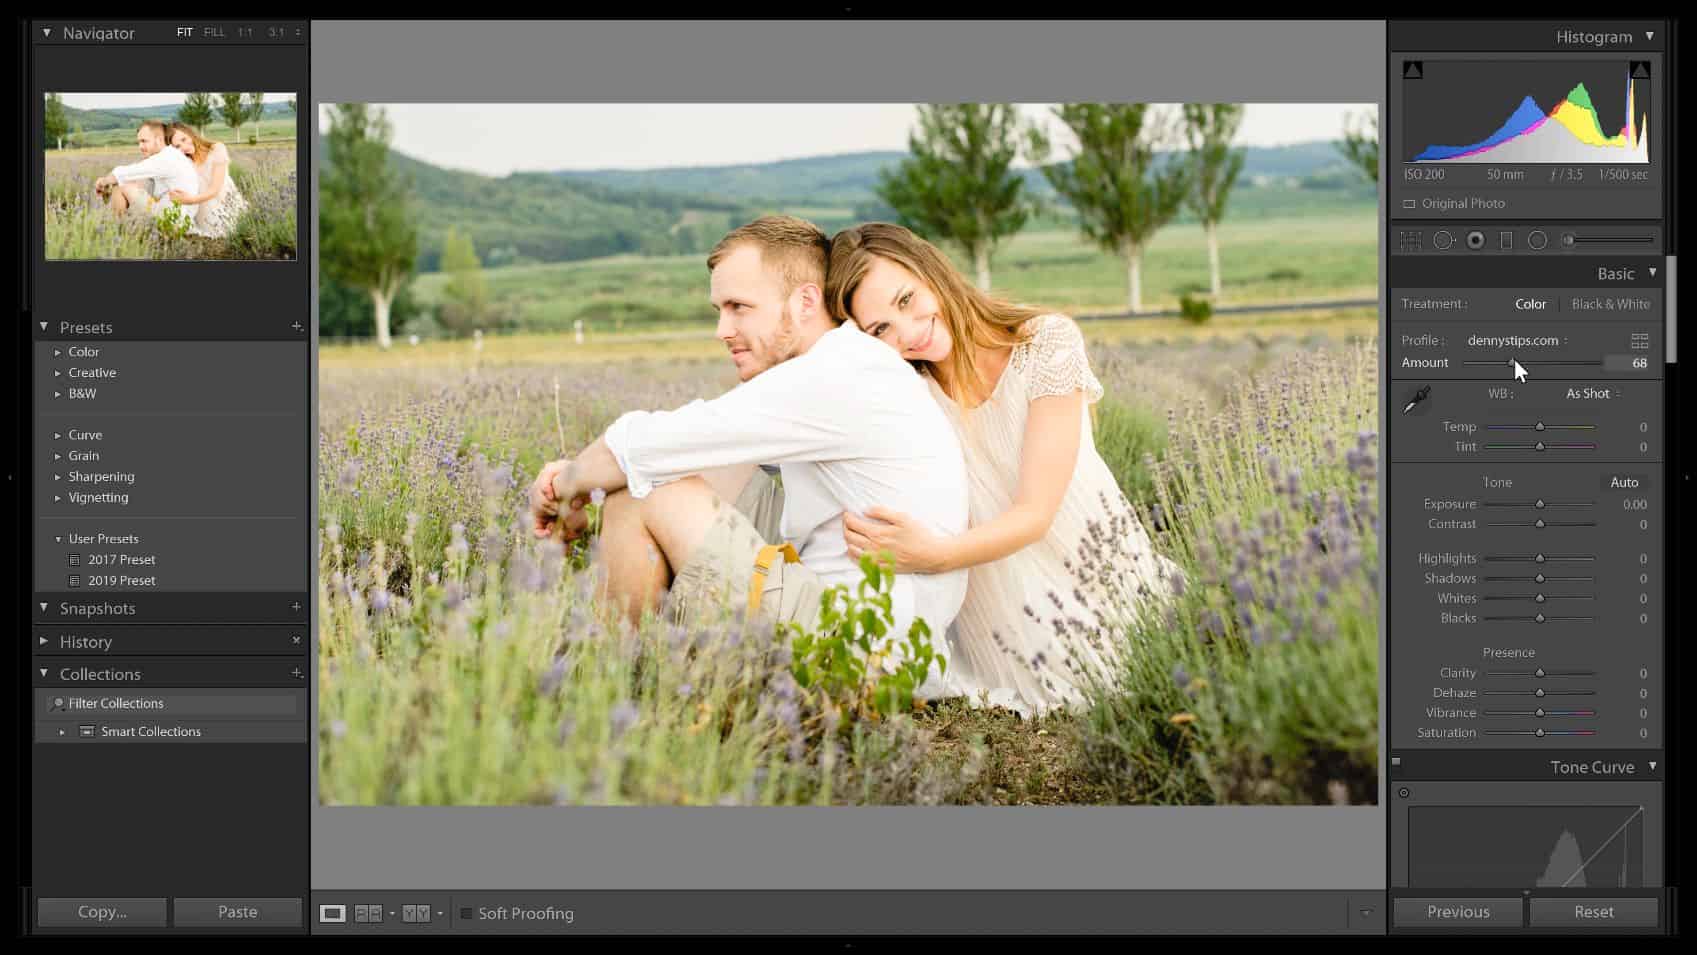
Here’s is the profile that is color grading your photo. You can control the opacity using the Amount slider on the top. The slider goes from 0 to 200%. Anything over 100% is not guaranteed to work. Depending on the color grading, you might get weird color or tonal shifts.
This has been so helpful because no other tutorial or help forum had known about the ‘second pass’. My results are much closer now but I’m still struggling to match the original RAW file + Preset with the new RAW file + Profile. Although the character of the preset comes through, however many versions I try there is always a saturation shift with the Profile compared to the original Preset; the Profile is always a bit less saturated when placed side by side. Very frustrating, and your help much appreciated!
Photoshop 2020 (latest); LR Classic 9.2
Hmm.. can you check the original preset to see if it’s applying a color profile (ex. Adobe Standard)?
It’s possible that the color profile is getting replaced with the new profile.
You’re also welcome to email me at denny@2000px.com with your preset and I’ll take a look at it for you.
That would be so helpful and I’ll email it shortly.
Meanwhile, I’ve been double – and triple–checking all my workings against your tutorial but I simply can’t see what might be going wrong. Hope your theory might be correct but I admit I’m totally out of my depth now!
In case anyone is having the same issue with profiles looking different than the original preset, the problem is that the profile isn’t saving the calibration settings.
Example of calibration settings: https://i.imgur.com/jAz65OT.png
To fix this, create the profile as shown in this tutorial. Then create a Lightroom PRESET with:
1. The profile you just created
2. The calibration setting from the original preset
Screenshot: https://i.imgur.com/BkkyQho.png