This week I spent the entire time making some really cool Photoshop actions based on my favorite camera. This here is the Yashica EZ F521. It’s cheap, plasticy, and only 5 megapixels. But the photos that come out of this are really nice. Unlike most other digital lomography cameras which are really just cheap cameras rebranded as something stylish and retro, the Yashica has a nice color characteristic that’s similar to film. I like it so much that I wanted to buy a second one as a backup. But it’s no longer being produced and I can’t find it anyone selling it for a reasonable price. So as a personal project, I created a set of Photoshop actions to emulate everything from this camera; from the film-like color characteristics, to all of the in-camera effects, and even the sharpness and noise pattern. I spent so much time making these Photoshop actions to get them to look at authentic as possible. And I wasn’t even sure if this was something that people wanted, but I figured I might as well make it into a proper product that other people can use and if people like it, they like it. If not at least it’s something that I’ll still use.
Free Download
These free Photoshop actions lets you apply a realistic Yashica EZ F521 look and four special effects.
Download Yashica EZ 521 Photoshop Actions
Yashica EZ 521 Pro
The Pro version comes with all the features in the free version plus:
- 7 additional special effects
- Simulated image quality
- Color lookup profiles
- Fixes common document issues (Photoshop CC)
Yashica EZ F521 Pro can be purchased at SparkleStock or Creative Market. Thank you so much for your support!
How to Use the Photoshop Actions
Step 1
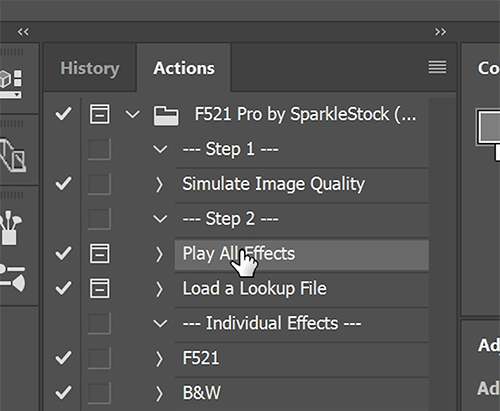
After downloading, you can install them by doubleclicking on the ATN file. Once you have the ATN file loaded, you can find the actions in the Actions panel. If you don’t see this panel, you can open it by going to Window > Actions. Select the “Play All Effects” action and then hit the play button on the bottom of your panel.
Step 2
It’ll automatically render all the effects so that you don’t need to play the actions one-by-one. Once the action is done playing, you can click Continue to open the History panel and now you can pick any effect you like. By the way, in the free version you’ll only get access to a couple of these effects. But both versions will have the snapshot prerendering feature. This feature will prerender all of the effects letting you switch between them instantly. It saves you a lot of time because you don’t need to play each action one-by-one.

Step 3
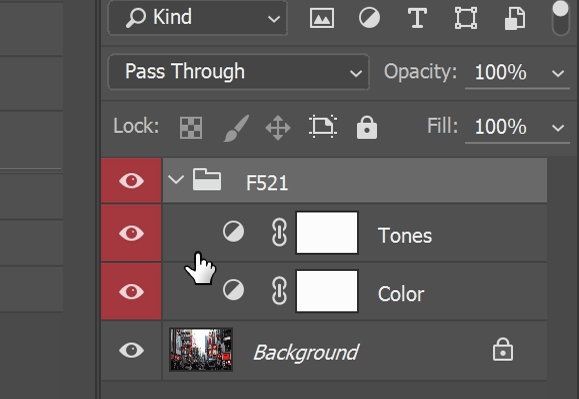
For the layer setup, you’ll find it very clean and simple. It’s made with the two layer technique which is the most simple and efficient way to color grade in Photoshop. The layers are fully editable and you can control the opacity of the layers.
Pro Version Guide
Loading the Photoshop Actions
If you purchased the Pro version, and thank you so much for your support by the way, you’ll get two ATN files. If you’re using Photoshop CC, make sure that you use the Photoshop CC Edition which can automatically detect and fix common document issues, such as if your image is in the wrong color mode. The pro version also comes with a lot features. So in addition to getting all of the camera’s postprocessing effects, you’ll also get an action that will let you emulate the image quality. It will resize your image, it will match the softness of the sensor and lens, it’ll add the same sharpening effect and even emulate the same noise pattern. The end result is something incredibly close to what the camera produces.

Accessing the Original Document
The layer setup in the Pro version is slightly different. If you want to go back to your original document, it’s all been preserved in this layer here. Simply doubleclick on it and it’ll open your original document with all of your layers. You can make any changes you like and when you’re done, simply save and close the document.

Image Quality Layer Group
In the Image Quality layer group, you’ll find two layers. You can change the opacity to adjust the strength of the layers. The Image Quality layer here basically emulates the softness of the camera to get that authentic look.
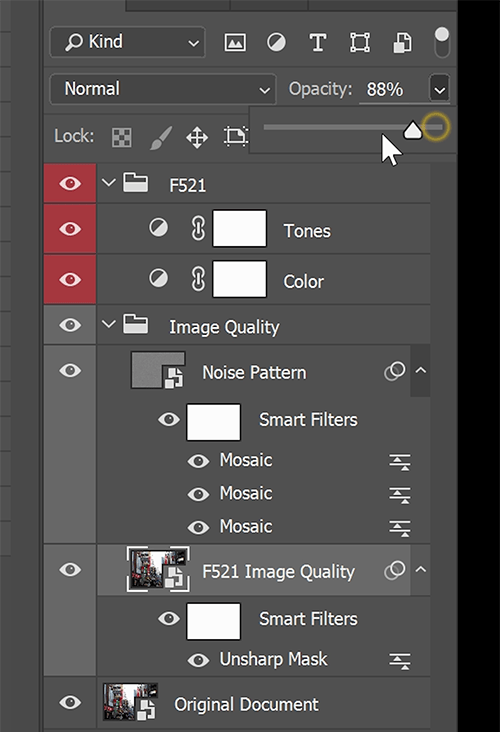
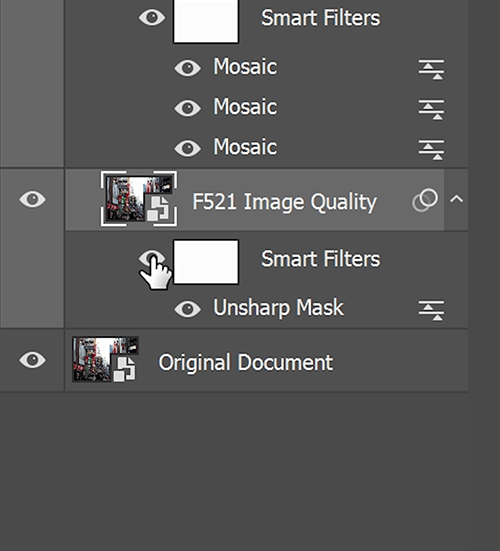
There’s also an Unsharp Mask smart filter which you can turn on or off and this emulates the sharpening that the camera does.
Noise Pattern Layer
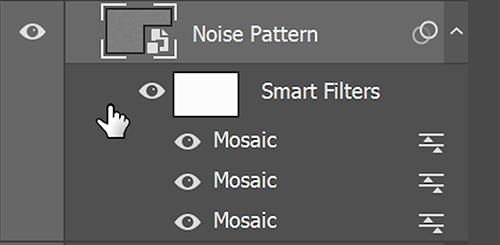
The Noise Pattern layer is self explanatory. But you’re probably wondering what these Mosaic filters are here for. Basically they pixelate the noise to match the noise pattern that’s generated from the camera. Getting the right noise pattern just makes the emulation way more authentic and I personally think it plays a significant role in the overall look.
Color Lookup Files
The final and best feature of the Pro version is that you get the color lookup files. With these files, you can apply the same color grading in other software such as Adobe Premiere and Media Encoder.

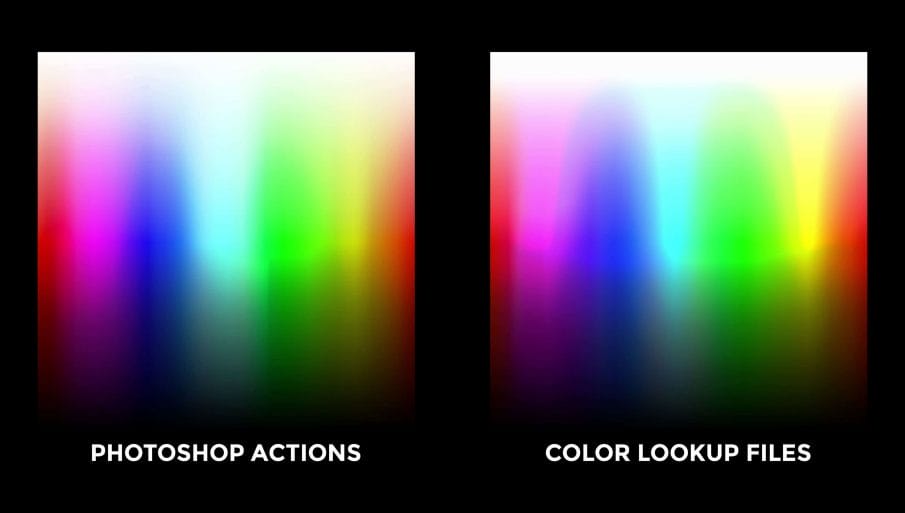
It’s also better to use these in Photoshop because they have much more accurate colors. To describe it quickly, the color lookup files will adjust the colors based on the tonal range. Unlike the Photoshop actions, the colors will shift different depending if it’s in the shadows, midtones or highlights.
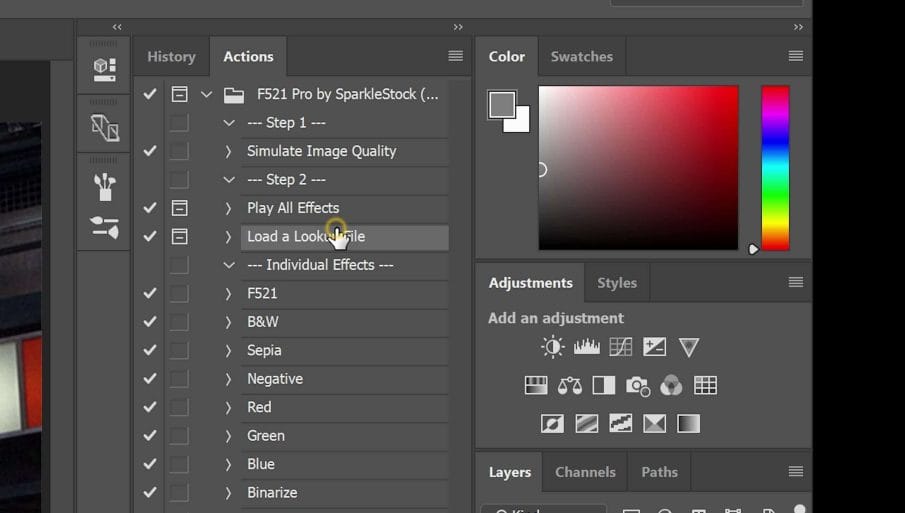
To use them, simply add a Color Lookup adjustment layer or play the “Load a Lookup File” action. Give your layer a name then click OK. In the 3DLUT file dropdown, click on “Load 3D Lut”, browse for the file, then click OK.
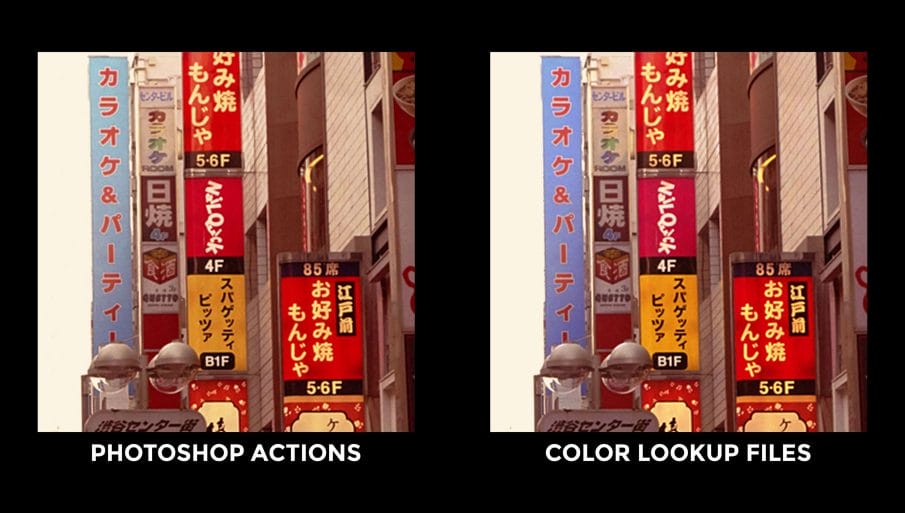
At first glance, it looks the same as the Photoshop actions. If you compare the photos side-by-side, you’ll notice quite a significant difference especially with high contrast and colorful photos.
Examples
Here are some examples of photos processed with these Photoshop actions.


